
How to Add Transitions to a Video on iPhone
Transitions are what make the difference between a video that feels like a slideshow and one that feels like a story. A well-timed cut keeps viewers locked in. A jarring one makes them scroll past. If you edit on your iPhone and want to add transitions to a video without wrestling a complex timeline, this guide walks through the whole process.
You can add transitions to a video on iPhone in minutes using EditorPro, a free mobile editor with 37 built-in transitions across six categories. Everything below uses the exact labels you will see in the app, so you can follow along tap for tap.
What transitions are and when to use them
A transition is the visual bridge between two clips. It can be invisible (a simple dissolve), energetic (a whip pan), or stylistic (a glitch). The goal is always the same: keep the viewer oriented as the scene changes.
Here is a quick way to think about it:
- Basic transitions (Cross Dissolve, Fade to Black) work for almost anything. Use them when you do not want the cut to call attention to itself.
- Motion transitions (Whip Pan, Zoom, Spin) add energy. They are great for fast-paced Reels and TikToks where beat-matching matters.
- Stylized transitions (Glitch, VHS, Light Leak) make a statement. Use them for music videos, creative edits, or moments where you want the viewer to notice the effect.
How to add a transition on iPhone, step by step
EditorPro places transitions at the boundary between two clips on your timeline. Here is the full flow:
- Open your project. If you do not have one yet, tap the plus icon to import two or more clips. You need at least two clips on the timeline for a transition to have somewhere to sit.
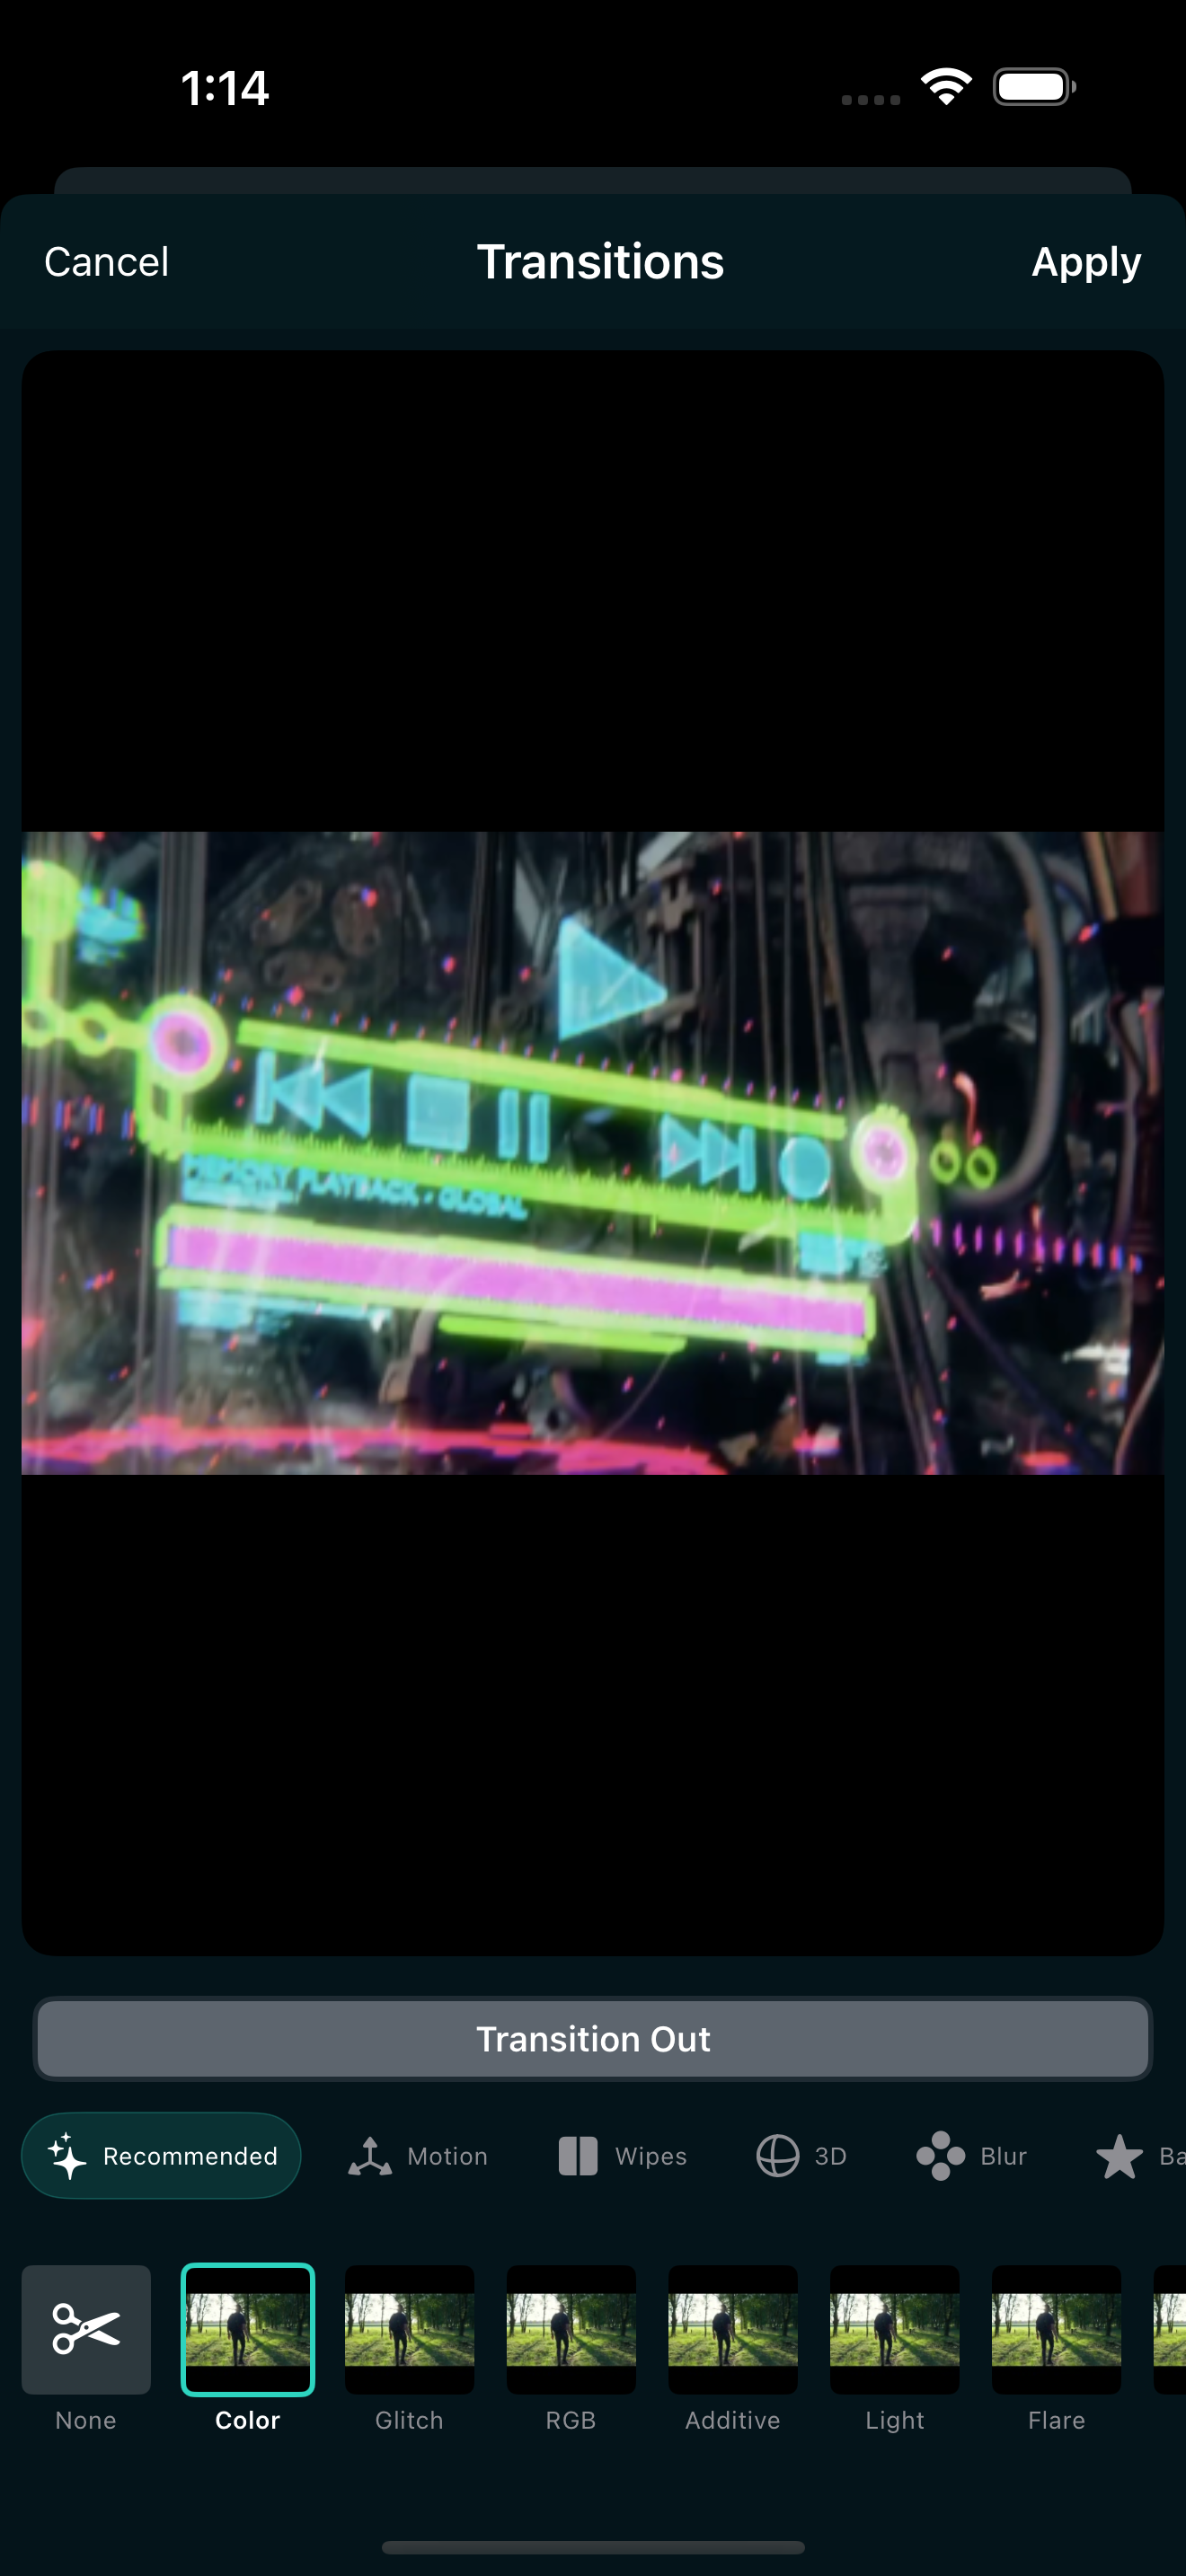
- Tap Transition in the bottom tool strip. The transitions panel opens as a sheet over the editor.
- Choose Transition In or Transition Out. Transition In affects how the clip at the playhead begins. Transition Out affects how it ends. You can set both independently.
- Pick a category. The panel groups transitions into six categories: Basic, Motion, Wipes, Recommended, 3D, and Blur. Browse the thumbnails to preview each one.
- Set the duration. The default is 1.0 second. A shorter duration (0.3 to 0.5s) feels snappy and modern. A longer one (1.0 to 1.5s) feels more cinematic and deliberate.
- Apply to one clip or all clips. If you want the same transition everywhere, apply it to all clips at once. If you want variety, apply it clip by clip.
That is it. The transition renders instantly on your timeline and you can preview it by tapping play. If you do not like it, tap Transition again and pick a different one, or use undo to step back.
The 37 transitions, organized
Knowing what is available helps you pick the right one faster. Here is the full catalog broken down by category.
Basic (5)
The workhorses. Use these for vlogs, talking-head content, and any edit where you want the transition to disappear.
- Cross Dissolve - the most natural blend between two clips.
- Film Dissolve - a slightly grainier, filmic dissolve.
- Fade to Black - a classic cinematic fade, great for chapter breaks.
- Fade to White - a bright, dreamy fade that works for flashbacks or openings.
- Morph Cut - smooths over jump cuts in talking-head footage.
Motion (9)
High-energy transitions for music videos, action clips, and beat-synced edits.
- Whip Pan (Right, Left, Up, Down) - a fast camera swing that hides the cut. Pair it with motion in your footage for a seamless feel.
- Zoom In / Zoom Out - a quick push or pull that adds emphasis.
- Spin (Clockwise and Counter-Clockwise) - a playful rotation between clips.
- Whip Flash - a whip pan with a flash frame, great for beat drops.
Wipes (8)
One clip pushes or reveals the next. Good for structured, graphic edits.
- Wipe (Right, Left, Up, Down) - a directional sweep.
- Push - the new clip pushes the old one off screen.
- Slide - the new clip slides in over the old one.
- Iris - a circular reveal, like an aperture opening.
- Clock Wipe - a sweeping clock-hand reveal.
Recommended (7)
The popular, stylized transitions that trend on social platforms.
- Glitch - digital distortion, perfect for tech and music content.
- VHS - a retro tape effect with tracking lines.
- Light Leak - a warm, dreamy flash of light.
- Lens Flare - a streak of light across the frame.
- RGB Split - a chromatic aberration split, great for glitchy energy.
- Additive Dissolve - a bright, additive blend between clips.
- Dip to Color - a brief flash to a solid color, like a transition you would see in a music video.
3D (4)
Flip and peel effects for a more graphic, designed feel.
- Page Right / Page Left - a page-turn peel effect.
- Flip (Horizontal) / Flip (Vertical) - the clip rotates around its axis to reveal the next one.
Blur (4)
Soft, defocused transitions that feel organic and gentle.
- Horizontal Blur / Vertical Blur - a directional blur slide.
- Zoom Blur - a blur with a zoom, great for dream sequences.
- Spin Blur - a rotational blur, energetic but smooth.
Choosing the right transition for your content
With 37 options, the choice can feel overwhelming. Here are some simple rules that work across most projects:
- For Reels and TikTok: Whip pans and glitch transitions match the fast, beat-driven pacing of short-form content. Keep durations short (0.3 to 0.5s) so they feel snappy.
- For vlogs and talking-head videos: Cross Dissolve and Morph Cut keep the focus on the speaker. A Morph Cut specifically helps hide trims in interview footage.
- For travel and cinematic edits: Fade to Black and Film Dissolve give breathing room between scenes. Light Leak and Lens Flare add a touch of warmth for golden-hour footage.
- For music videos: Glitch, RGB Split, and Dip to Color make every cut feel intentional and on-beat.
- For product demos and explainers: Wipes and Push transitions give a clean, graphic feel that suits structured content.
When in doubt, use Cross Dissolve. It is the most versatile transition in the catalog and almost never looks wrong.
Pro tips for better transitions
- Match motion direction. If your subject is moving left, a Whip Pan Left feels natural. Going against the motion direction feels jarring on purpose, which can work for shock cuts.
- Keep durations consistent. If every transition is 0.5s except one that is 1.5s, that one will stand out. Consistency makes a string of cuts feel like a single sequence.
- Less is more. Using the same one or two transitions throughout a video looks more polished than cycling through all 37. Variety is fun, but restraint reads as professional.
- Use Fade to Black for scene breaks. It signals a clear chapter boundary and gives the viewer a beat to reset.
Every transition in EditorPro is free, so you can experiment without hitting a paywall. Try different combinations and see what fits your footage.
Exporting your video with transitions
Once your transitions are in place, tap the share icon in the top toolbar to export. You get three free quality options: Web Share (720p, 3 Mbps), 720p HD (5 Mbps), and 1080p HD (10 Mbps). All free exports include a small EditorPro watermark in the bottom-right corner.
If you want a watermark-free export or 4K Ultra output, EditorPro Pro removes the watermark and unlocks 4K at 3840x2160 and 35 Mbps. Pro is $2.99/month or $14.99/year with a 7-day free trial on the annual plan.
Add transitions to your next video
EditorPro gives you 37 free transitions on your iPhone, from smooth dissolves to glitch and whip pans. Download it and try them on your next edit.
Download on the App Store