
How to Blur the Background of a Video on iPhone
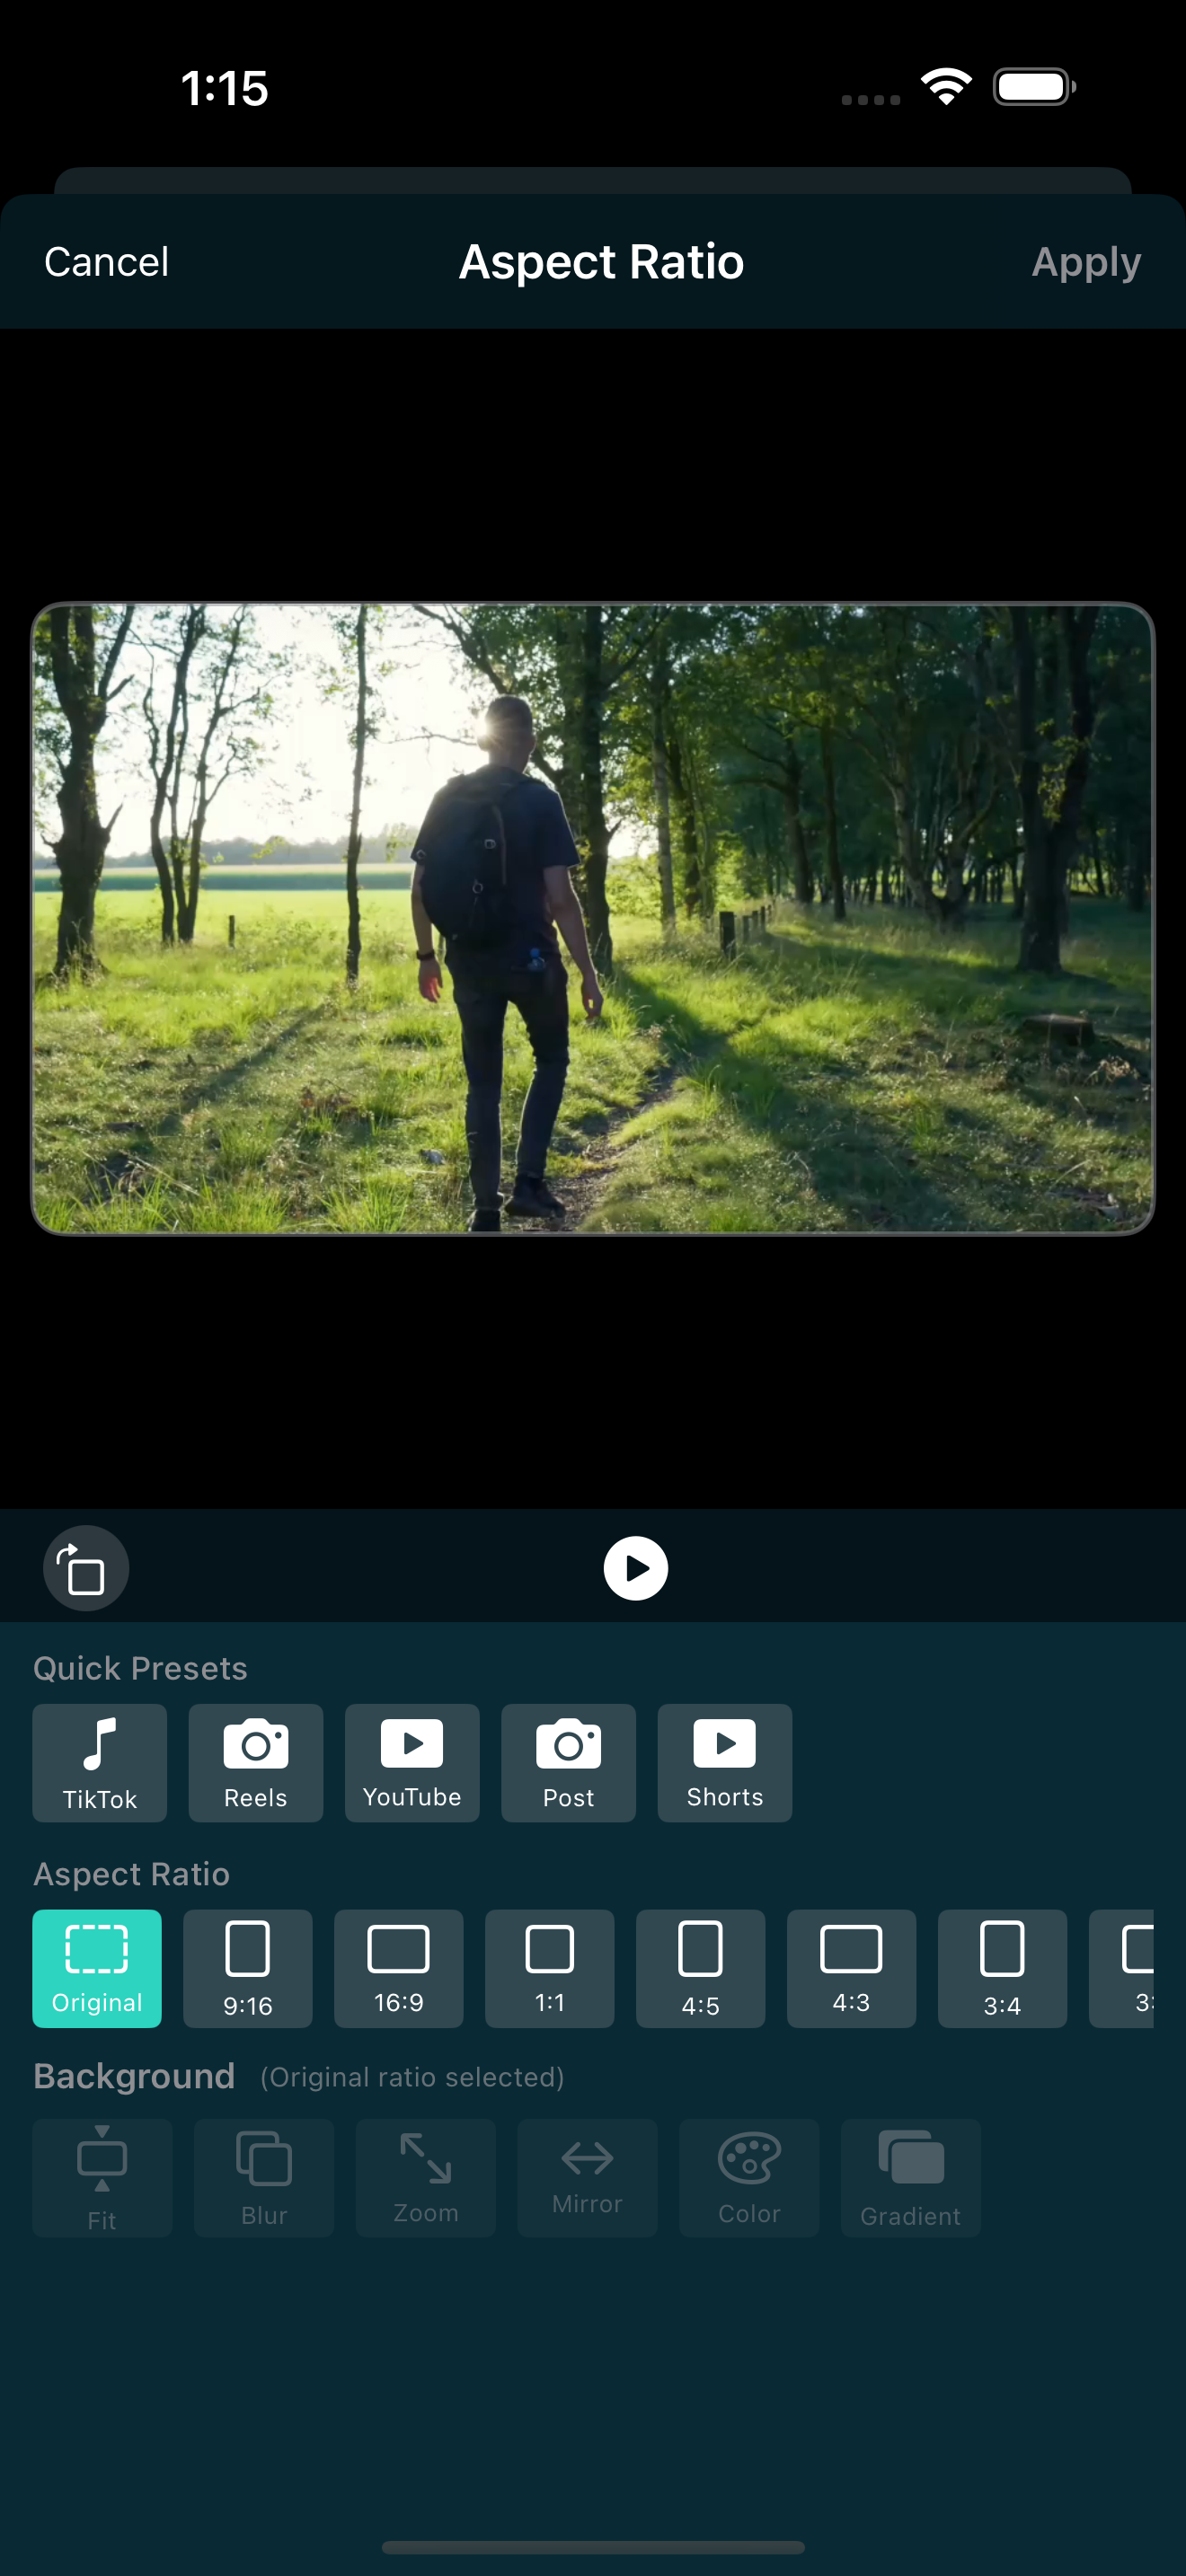
You shot a video in landscape, and now you want it vertical for Reels or TikTok. The problem: switching from 16:9 to 9:16 leaves black bars on the sides. Or maybe you just want a soft, blurry background behind a talking-head clip to make it look more professional. Either way, you need to blur the background of a video, and you want to do it on your iPhone without a desktop editor.
There are two distinct ways to blur a video background on iPhone, and they solve different problems. One fills empty space when you change aspect ratio. The other applies a blur effect to part of the frame for a creative look. Here is how to do both, step by step, using EditorPro.
Method 1: Blur Background fill mode (fix black bars)
When you change a video from landscape to portrait (or vice versa), the canvas shape no longer matches your footage. EditorPro gives you several fill modes that decide what goes in the empty space. Blur Background is the one that fills it with a soft, defocused copy of your video instead of black bars.
Here is how to turn it on:
- Open your project in EditorPro.
- Tap Aspect in the bottom tool strip.
- Pick the target ratio. For Reels and TikTok, choose Portrait (9:16). For a feed post, try Square (1:1).
- At the bottom of the aspect panel, you will see the fill mode options: Fit (black bars), Blur Background, Zoom to Fill, Mirror Edges, Solid Color, and Gradient.
- Select Blur Background.
That is it. The empty area behind your video now shows a blurred version of the same footage, which looks intentional and polished rather than letterboxed. You can still reposition your video within the frame by dragging it in the preview.
When to use this method: any time you are converting a horizontal video to a vertical format (or the reverse), and you do not want to crop away content. It is the fastest fix for the "shot in landscape, need it in portrait" problem.
Method 2: Blur and Tilt-Shift effects (creative blur)
Sometimes you want a blur that is not about filling space. You want a shallow depth-of-field look, a dreamy focus pull, or a miniature tilt-shift effect. EditorPro has four blur-based effects in its Effects library that handle this.
Tap Effects in the bottom tool strip, then open the Blur category. You will see:
- Blur: a full-frame gaussian blur. Use it for a dreamy transition, a soft opening, or to obscure something sensitive.
- Radial: blurs outward from a center point, keeping the middle sharp. Good for drawing attention to a subject.
- Fog: a soft, bokeh-style blur that adds atmosphere without losing the image entirely.
- Tilt-Shift: the miniature-look effect. It keeps a horizontal strip sharp and blurs everything above and below, simulating a toy-camera lens.
Each effect has an intensity slider so you can dial it from subtle to strong. You can also set a start and end time on the clip, which means you can animate the blur in or out instead of having it run the full duration.
Here is a quick walkthrough for a tilt-shift look:
- Tap the clip you want to blur.
- Open Effects and scroll to the Blur category.
- Tap Tilt-Shift.
- Drag the intensity slider to taste. Around 60 to 80 percent usually reads as a tilt-shift without obscuring too much.
- Set the start time to the beginning of the clip and the end time a few seconds in if you want the blur to ease out as the clip plays.
You can stack up to five effects on a single clip, so you could combine a subtle Fog with a Radial blur for a layered look if you want something more complex.
Which method should you use?
It depends on what you are trying to fix or create:
- Black bars from an aspect ratio change: use Blur Background fill mode (Method 1). It takes one tap and fills the space automatically.
- A creative, in-frame blur on your subject: use the Blur, Radial, Fog, or Tilt-Shift effects (Method 2). You get an intensity slider and timing control.
- Both: combine them. Set Blur Background as your fill mode, then add a Fog effect on the clip for an even softer look.
A few tips for a better blur
- Reposition before you blur. After changing the aspect ratio, drag your video in the preview to make sure the subject is framed the way you want. The blur fills around whatever position you choose.
- Try Mirror Edges for a different fill. If Blur Background feels too soft, Mirror Edges reflects the edge pixels outward. It is a subtle look that some creators prefer for vertical conversions.
- Zoom to Fill crops instead of blurring. If you do not want any blur at all, Zoom to Fill scales the video to fill the canvas, cropping the edges. Use this when the subject is centered and you do not mind losing the borders.
- Keep the intensity reasonable. A tilt-shift at 100 percent can look extreme. Start around 50 and nudge up until it feels right.
One thing to keep in mind: fill modes apply to the entire canvas, so every clip in your project gets the same treatment. If you need different fill behavior on different clips, you can split the clip and handle each one separately, or use the Zoom to Fill or Blur effects on individual clips instead.
Exporting your blurred video
Once your blur looks right, tap the share icon in the top toolbar to export. Free users can export at 720p or 1080p with a small watermark. If you post frequently and want clean, watermark-free exports (plus 4K if you need it), EditorPro Pro is $2.99 per month or $14.99 per year with a 7-day trial on the annual plan.
The blur effects and Blur Background fill mode are both free, so you can try everything in this guide without paying anything.
Blur backgrounds and fix black bars on iPhone
EditorPro gives you Blur Background fill mode, four blur effects, and 138 filters in one app. Free to download, made for iPhone.
Download on the App Store