
How to Make a Video Vertical for Reels and TikTok
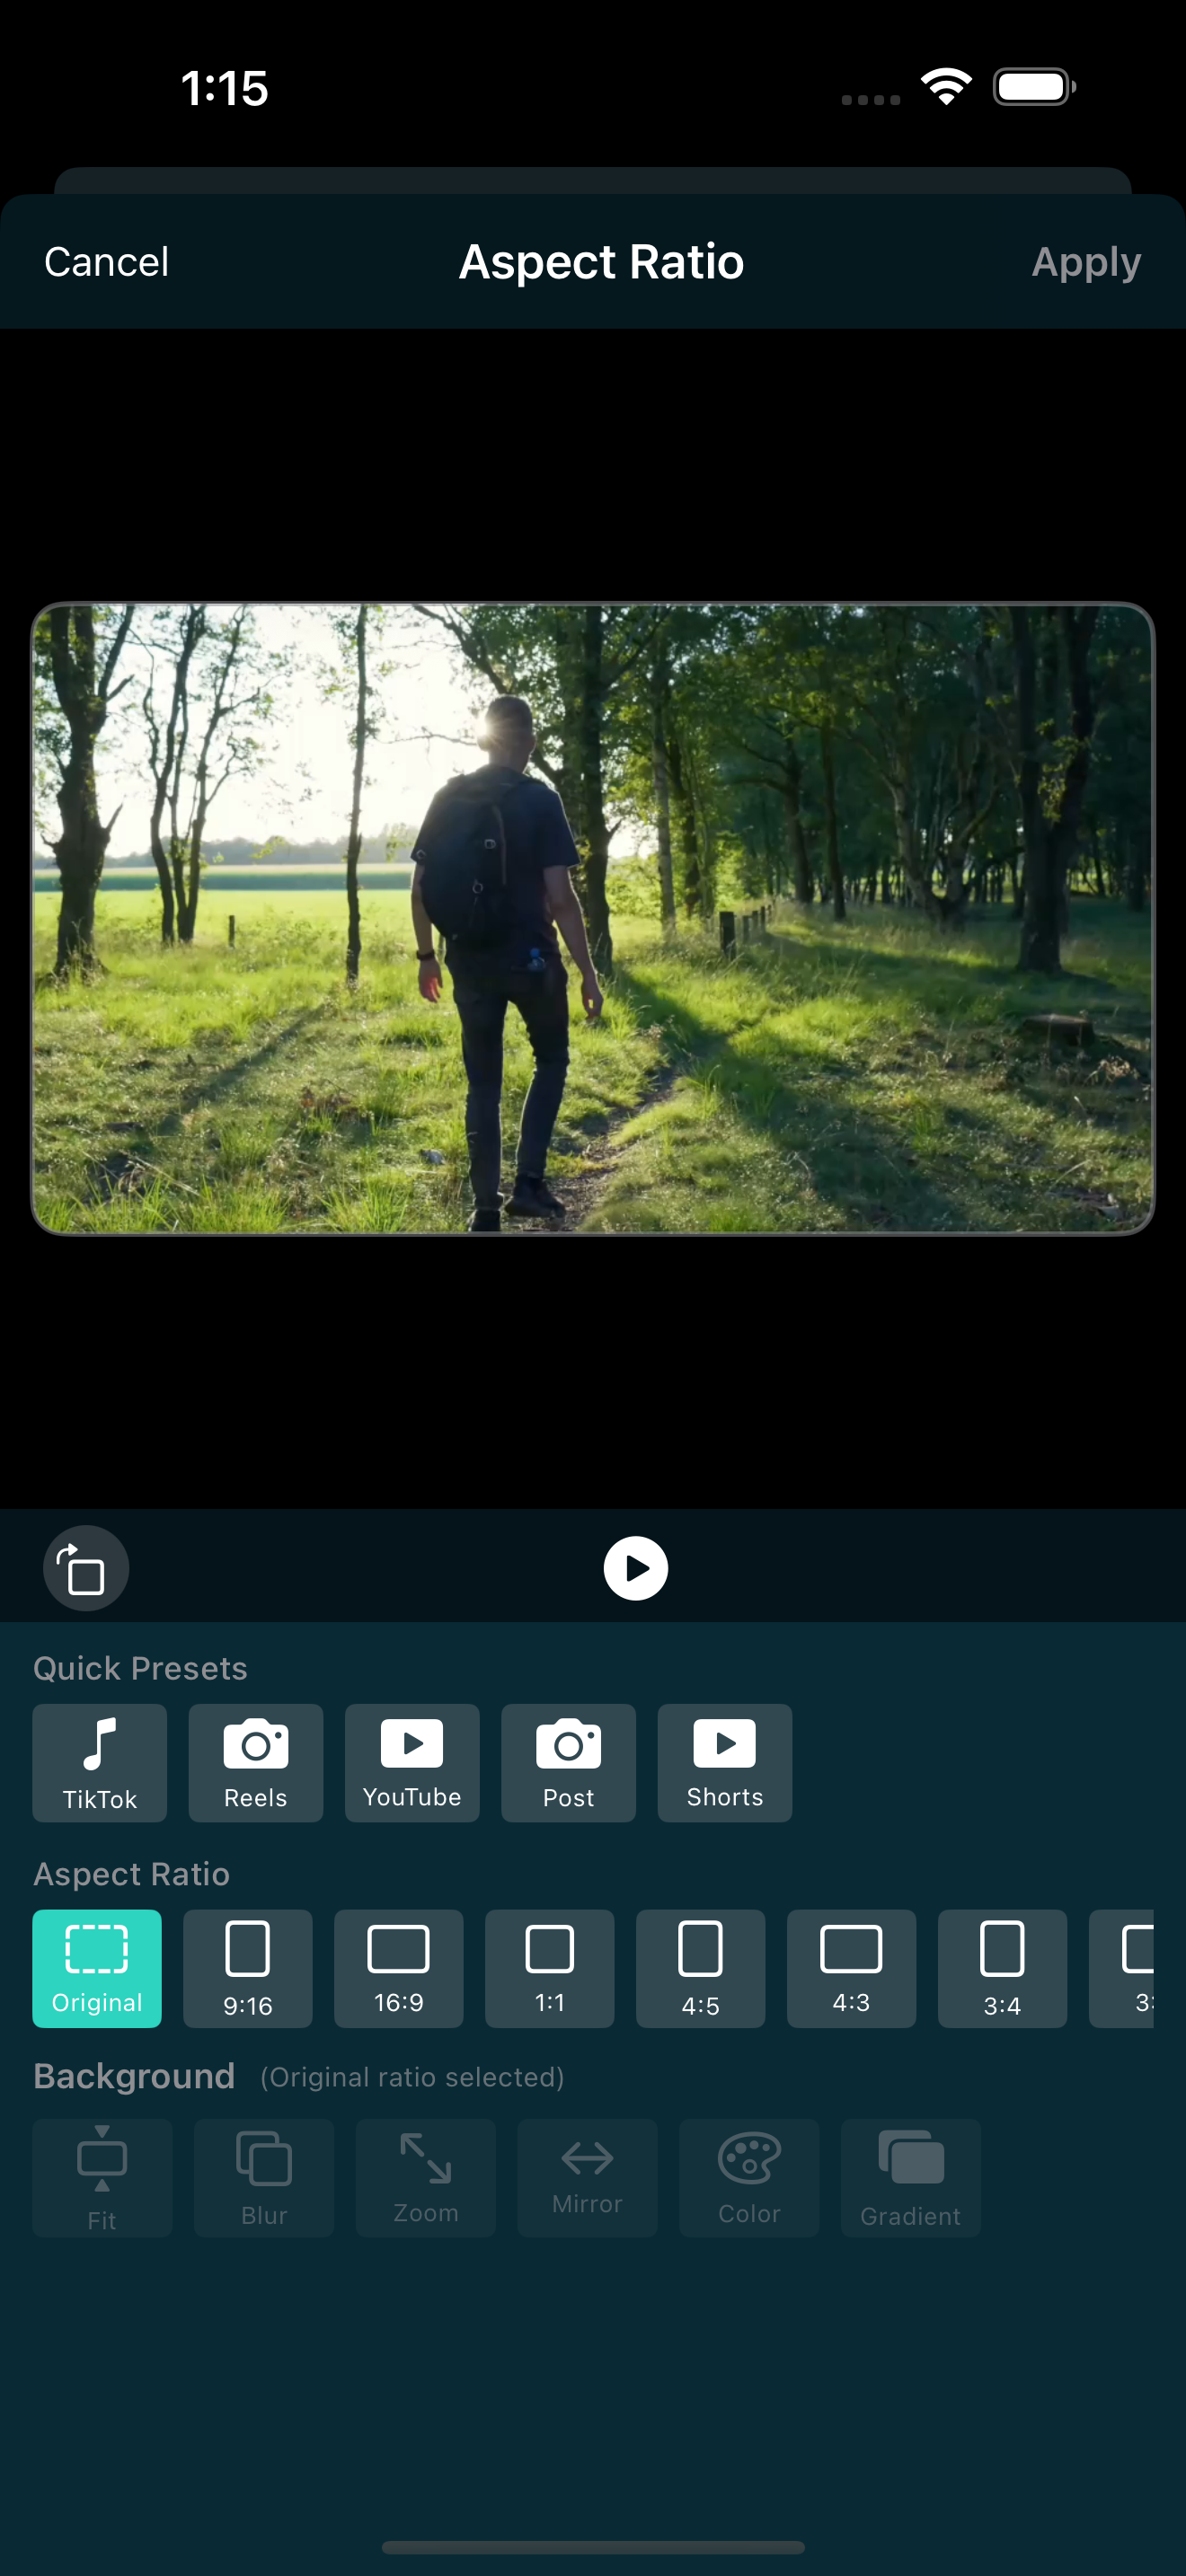
You shot a video in landscape, or you have an old clip that is wider than it is tall, and now you want to post it as a Reel or a TikTok. The problem is obvious: horizontal video in a vertical feed looks tiny, with thick black bars on both sides. The good news is that making a video vertical on iPhone is straightforward once you understand aspect ratios and fill modes.
This guide walks you through how to make a video vertical for Reels and TikTok, covering the right aspect ratio, the best ways to fill the frame, and a few tips that make the result look professional instead of awkward.
Why vertical video matters
Instagram Reels, TikTok, and YouTube Shorts all use a 9:16 aspect ratio. When you upload a horizontal 16:9 video, the platform squeezes it into a narrow column, leaving most of the screen empty. Viewers scroll past small, centered videos fast. A vertical video fills the screen, grabs attention, and gets more watch time.
The standard vertical format for these platforms is 9:16, which is the tall shape you see when you hold your phone normally. A few creators also use 4:5 (portrait Instagram feed size) or 3:4, but 9:16 is the universal short-form format. Stick with 9:16 for Reels and TikTok.
How to change your video to vertical on iPhone
Here is the step-by-step process using EditorPro, a free iPhone video editor that has a dedicated aspect ratio tool.
- Open your project. Launch EditorPro, start a new project, and import the video you want to convert.
- Tap Aspect in the bottom tool strip. This opens the aspect ratio editor, which shows your current canvas shape and a list of presets.
- Select Portrait (9:16). This is the vertical format used by Reels and TikTok. Your preview will immediately switch to a tall frame.
- Choose a fill mode. This is the important part. When you go from a wide video to a tall canvas, you have to decide what happens to the empty space on the sides. EditorPro gives you six fill modes (explained in the next section).
- Adjust your clip. If you chose Zoom to Fill, you can pinch and drag the clip in the preview to reposition the subject. If you chose Blur Background or Fit, you can skip this step.
- Export. Tap the share icon, pick your quality (720p and 1080p are free; 4K is Pro), and save to Photos. Then upload straight to Reels or TikTok.
The entire process takes under a minute.
Understanding fill modes
When you change a video from landscape to portrait, the canvas becomes taller than the original clip. The fill mode determines what fills the leftover space. Here are the six options in EditorPro and when to use each one:
- Fit (black bars). Keeps the full width of your original clip and adds black bars above and below, or on the sides. Honest and simple, but black bars look empty. Best for content where seeing the full frame matters more than screen coverage.
- Blur Background. Scales your clip to fill the height, then fills the side gaps with a blurred, softened copy of your video. This is the most popular choice for Reels because it looks intentional and keeps the subject clear.
- Zoom to Fill. Scales the clip until the entire canvas is covered, cropping the sides. Great when your subject is centered, but you lose content on the left and right. Pinch and drag to reposition the frame before exporting.
- Mirror Edges. Mirrors the left and right edges of the video to fill the vertical gaps. Subtle and works well when the edges are simple backgrounds.
- Solid Color. Fills the gaps with a flat color (black by default, customizable). Clean but minimal. Works for interview-style videos with text overlays.
- Gradient. Adds a smooth color gradient behind the video. Slightly more polished than a solid color and popular for quote or story-style clips.
For most Reels and TikToks, Blur Background is the safest and best-looking option. It fills the frame without losing any of your original content, and the soft blur behind the subject draws the eye inward.
Tips for better vertical video
Converting to vertical is easy. Making it look good takes a little more intention. Here are practical tips that improve the result:
Shoot vertical when you can
If you know the video is going to Reels or TikTok, shoot in 9:16 from the start. You will get better resolution and avoid the crop-or-fill decision entirely. Most iPhone cameras default to 16:9; just rotate your phone before you hit record.
Reposition the frame, not just the canvas
When you use Zoom to Fill, the default crop centers the frame. If your subject is off to one side, drag the clip in the preview so the person stays visible. This takes five seconds and saves you from posting a video where the speaker's face is cut off.
Add text to fill dead space
Vertical video has a lot of vertical room. If your clip is short on content on the top or bottom, add a text overlay. A title, a caption, or a call to action fills the space and makes the video more informative. EditorPro has 13 text styles, from plain to neon, that you can drag anywhere on the preview.
Match your filter to the platform
A quick color grade makes a vertical video feel finished. If you are posting to Reels, try the Reels Magic or Reels Pop filter under the Social category. For TikTok, TikTok Vibrant or TikTok Soft do the same job. These are platform-tuned presets that give the content a familiar, native look.
Use transitions between clips
If your vertical video has multiple clips, add transitions between them. A clean Cross Dissolve or a quick Whip Pan makes a multi-clip Reel feel like one smooth video instead of a choppy slideshow. EditorPro has 37 transitions across six categories, all free.
Other vertical formats to know
While 9:16 is the standard for Reels and TikTok, you might also encounter these vertical formats:
- Portrait (4:5) is the Instagram feed size. It is slightly wider than 9:16, so your Reel can double as a feed post with minimal adjustment.
- Portrait (3:4) is a classic photo proportion that works well for Pinterest and some ad formats.
- Square (1:1) is not vertical, but it is a common social format that avoids black bars on any platform.
EditorPro supports all of these aspect ratios, plus Cinematic (21:9 and 2.35:1) if you want to go wide for a different look. You can switch between them at any time in the same project without re-importing your clips.
A quick note on export quality
When your vertical video is ready, export it in the best quality you can. EditorPro lets you export in 720p and 1080p for free, with a small watermark in the corner. If you post regularly and want clean, watermark-free exports plus 4K resolution, the Pro plan removes the watermark and unlocks 4K for $2.99 a month or $14.99 a year with a 7-day trial.
For most casual creators, 1080p is more than enough. The watermark is small and does not cover the center of the frame. Focus on getting the aspect ratio and fill mode right first; quality upgrades come later.
Make your next Reel the right shape
EditorPro lets you switch any video to 9:16, pick a fill mode, reposition the frame, and export in seconds. Free to download, made for iPhone.
Download on the App Store