
How to Make a Slideshow with Music on iPhone
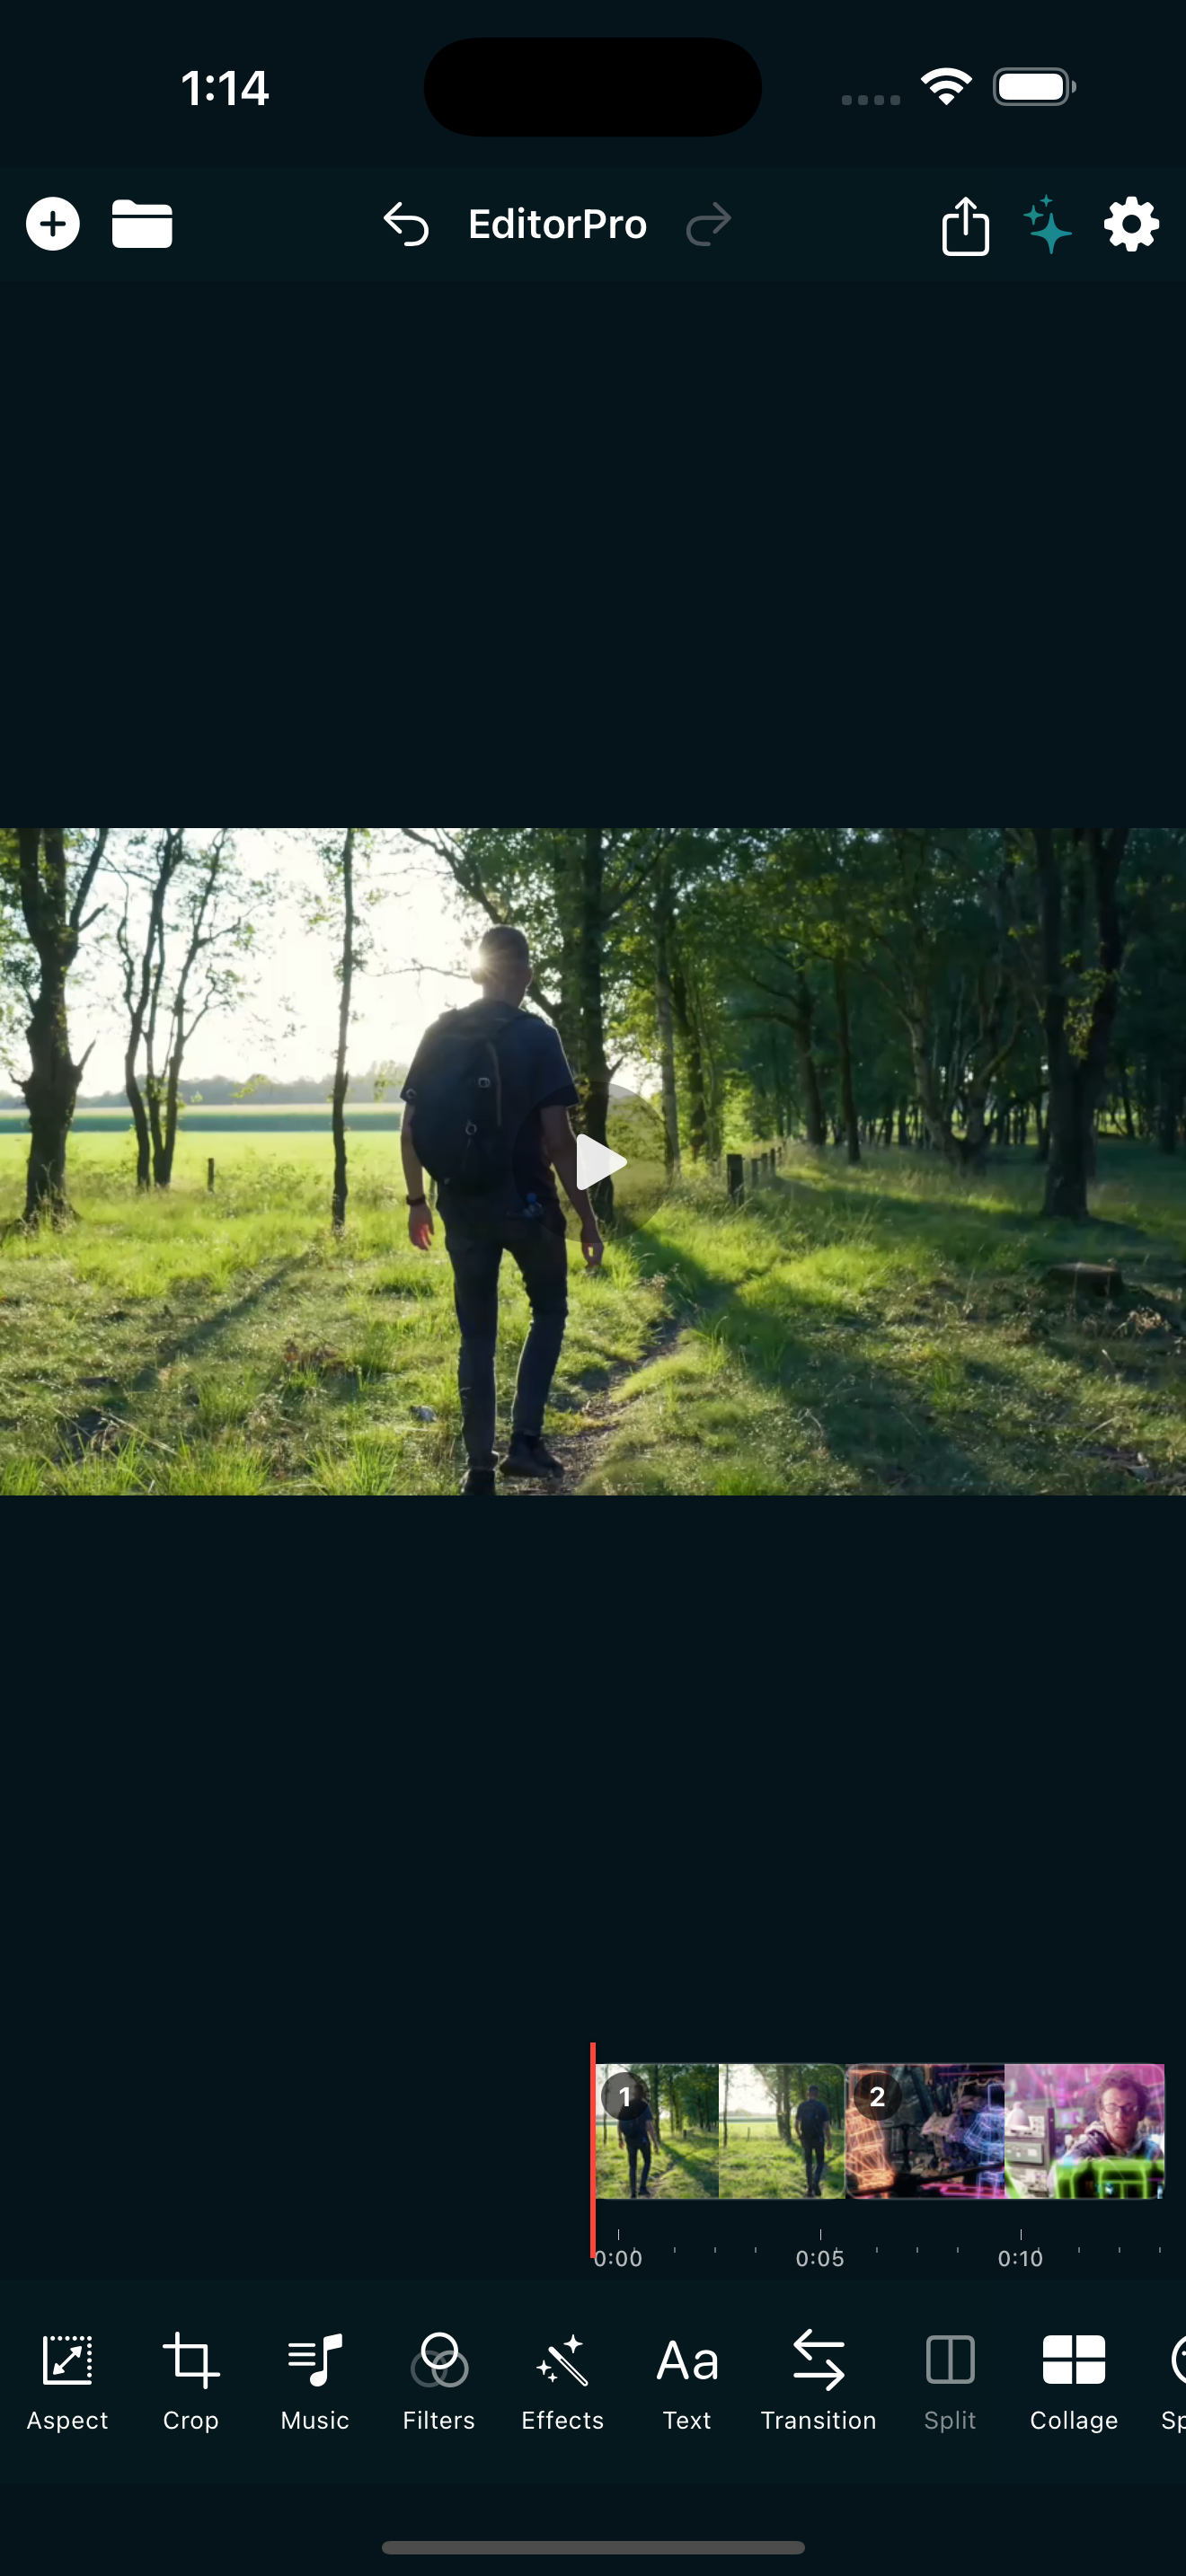
You have a folder full of photos from a trip, a birthday, or just a good weekend, and you want to turn them into a short video with music. A slideshow with music on iPhone is one of the easiest things you can make, and you do not need a desktop editor or any prior experience to pull it off.
This guide walks through the whole process: importing your photos, adding a soundtrack, choosing transitions, and exporting a video you can share. Everything here works on a free iPhone app called EditorPro, so you can follow along without spending anything.
What you need before you start
Two things: your photos (or a mix of photos and short video clips), and an idea of the mood you want. That is it. You can always change the music and the look later, so do not overthink the prep.
If your photos live across different albums, take a minute to favorite or collect them in one place so the import goes faster. EditorPro lets you import up to 10 items at a time, so a batch of 5 to 10 photos is a good starting point for a short slideshow.
Step 1: Import your photos
Open EditorPro and start a new project. Tap the + button in the top bar to open the photo picker. Select your photos. Each photo automatically becomes a 5-second clip on the timeline, so a 10-photo import gives you a roughly 50-second slideshow right away.
You can mix photos with short videos if you want some motion in the mix. The timeline is horizontal, so you will see your clips laid out left to right in the order you selected them. Drag to reorder if you want a different sequence.
Step 2: Trim and adjust clip length
Five seconds per photo is a fine default, but you might want some photos on screen longer and others shorter. Tap any clip and drag the trim handles to adjust its length. A good rule of thumb: keep your strongest photos on screen a beat longer, and cut the weaker ones shorter to keep the pace up.
If you want to split a clip (for example, to add a transition in the middle of a video clip), move the playhead to where you want the cut and tap Split. You can read more about trimming in our trim and split guide.
Step 3: Add music
This is the step that turns a sequence of photos into a slideshow. Tap Music in the bottom tool strip to open the audio panel.
EditorPro has a built-in library of 9 background music tracks across different moods: upbeat, romantic, mysterious, party, and more. Tap any track to preview it, then add it to your timeline. The music sits underneath your clips, and you can adjust its volume, set a fade in or fade out, and offset the start point so the beat lands where you want it.
If you prefer your own song, you can keep the clip audio from any video clips you imported and mute the rest.
For a deeper dive into the audio tools, see our guide to adding music to a video on iPhone.
Step 4: Add transitions between photos
Transitions smooth the jump from one photo to the next. Tap Transition in the bottom tool strip. You can set a transition to play as each clip ends (Transition Out) or as the next one begins (Transition In).
EditorPro has 37 transitions across 6 categories. For a photo slideshow, a few stand out:
- Cross Dissolve: the classic. One photo fades into the next. Clean, gentle, and works for almost any mood.
- Fade to Black: good for dramatic pauses or separating sections of a longer slideshow.
- Light Leak: adds a warm, filmic glow between clips. Pairs well with vintage filters.
- Zoom In: gives static photos a sense of forward motion.
- Whip Pan: energetic, good for upbeat music and fast-paced slideshows.
Set the duration for each transition. The default is 1 second, which works well for most slideshows. You can apply a transition to all clips at once if you want consistency, or mix and match for variety.
Step 5: Add a filter for a unified look
Photos from different sources, lighting conditions, and times of day can look inconsistent next to each other. A filter ties everything together with a single color grade.
Tap Filters in the bottom tool strip. There are 138 filters across 8 categories. For slideshows, a few categories are especially useful:
- Cinematic: film-grade looks like Noir, Drama, or Vivid that give your slideshow a movie feel.
- Vintage: retro looks like Polaroid, Super 8, or Film if you want a nostalgic tone.
- Mood: emotional grades like Dreamy, Cozy, or Nostalgic that match the feeling of your photos.
- Pro: subtle corrective grades like Clean or Enhance if you want a natural look without heavy styling.
Each filter has an intensity slider from 0 to 100 percent. You can apply it to the current clip only, or toggle the scope to apply it to all clips for a consistent look across the whole slideshow.
Step 6: Add text (optional)
If you want to label a section, add a title, or put a date on screen, tap Text in the bottom tool strip. Type your text, pick from 13 built-in styles (Plain, Shadow, Outline, Neon, Background, and more), and drag to position it on the preview. You can set a start time and duration so the text appears only on the right clip.
For a slideshow, a simple title at the start and maybe a caption or two in the middle is enough. Less is usually more.
Step 7: Choose the right aspect ratio
Think about where your slideshow will live. If you are posting to Instagram Reels or TikTok, tap Aspect and switch to 9:16 (Portrait) so the video fills the screen vertically. For YouTube or a TV, 16:9 (Landscape) is the right choice. For a square post, 1:1 works.
If your photos are landscape but you want a vertical slideshow, use a fill mode like Blur Background or Zoom to Fill so there are no black bars.
Step 8: Export and share
Tap the share icon in the top toolbar to open the export sheet. Pick a quality tier:
- Web Share (720p, 3 Mbps): smallest file, fastest export. Good for messaging apps.
- 720p HD (5 Mbps): solid quality for social media.
- 1080p HD (10 Mbps): the sweet spot for most uses. Sharp on phones and desktops.
- 4K Ultra (Pro only): maximum quality if you want to project or display on a large screen.
Free exports are unlimited but include a small watermark in the bottom-right corner. If you make slideshows often and want clean exports, EditorPro Pro removes the watermark and unlocks 4K for $2.99/month or $14.99/year (with a 7-day free trial on the annual plan).
Once the export finishes, the video saves to your Photos library. From there you can share it anywhere.
The one-tap shortcut: Auto Reel
If all of the above sounds like too many steps for what you need, EditorPro has a feature called Auto Reel that does most of it for you. Pick a mood, select 5 to 15 photos, and the app builds a complete slideshow with Ken Burns motion on each photo, mood-matched filters, transitions between clips, and background music that fits the mood.
You get one Auto Reel per week on the free plan, which is enough for occasional use. If you want to make slideshows more often, Pro gives you unlimited Auto Reel generations.
You can still edit anything Auto Reel produces. Tap Use This Reel to load it onto the timeline, then trim, swap the music, change the filter, or add text just like a project you built manually.
Tips for a better slideshow
- Start with your best photo. The first frame sets the tone. If it is strong, people keep watching.
- Match the music to the mood. Upbeat tracks for fun trips, something gentler for family memories. The built-in library covers both ends.
- Keep it under 60 seconds. A tight slideshow almost always holds attention better than a long one. If you have more photos, make two short slideshows instead of one long one.
- Use one filter for the whole project. Consistency makes a slideshow feel intentional. Toggle the filter scope to "all clips" and pick one look.
- Add a transition once, apply to all. A single transition style across every clip keeps the rhythm steady.
That is the full process. You can make a polished slideshow with music on iPhone in about five minutes, and the result is a video you can text, post, or keep for yourself.
Make your slideshow in minutes
EditorPro turns your photos into a music-synced slideshow with built-in tracks, 138 filters, and 37 transitions. Free to download, made for iPhone.
Download on the App Store