
How to Trim and Split a Video on iPhone
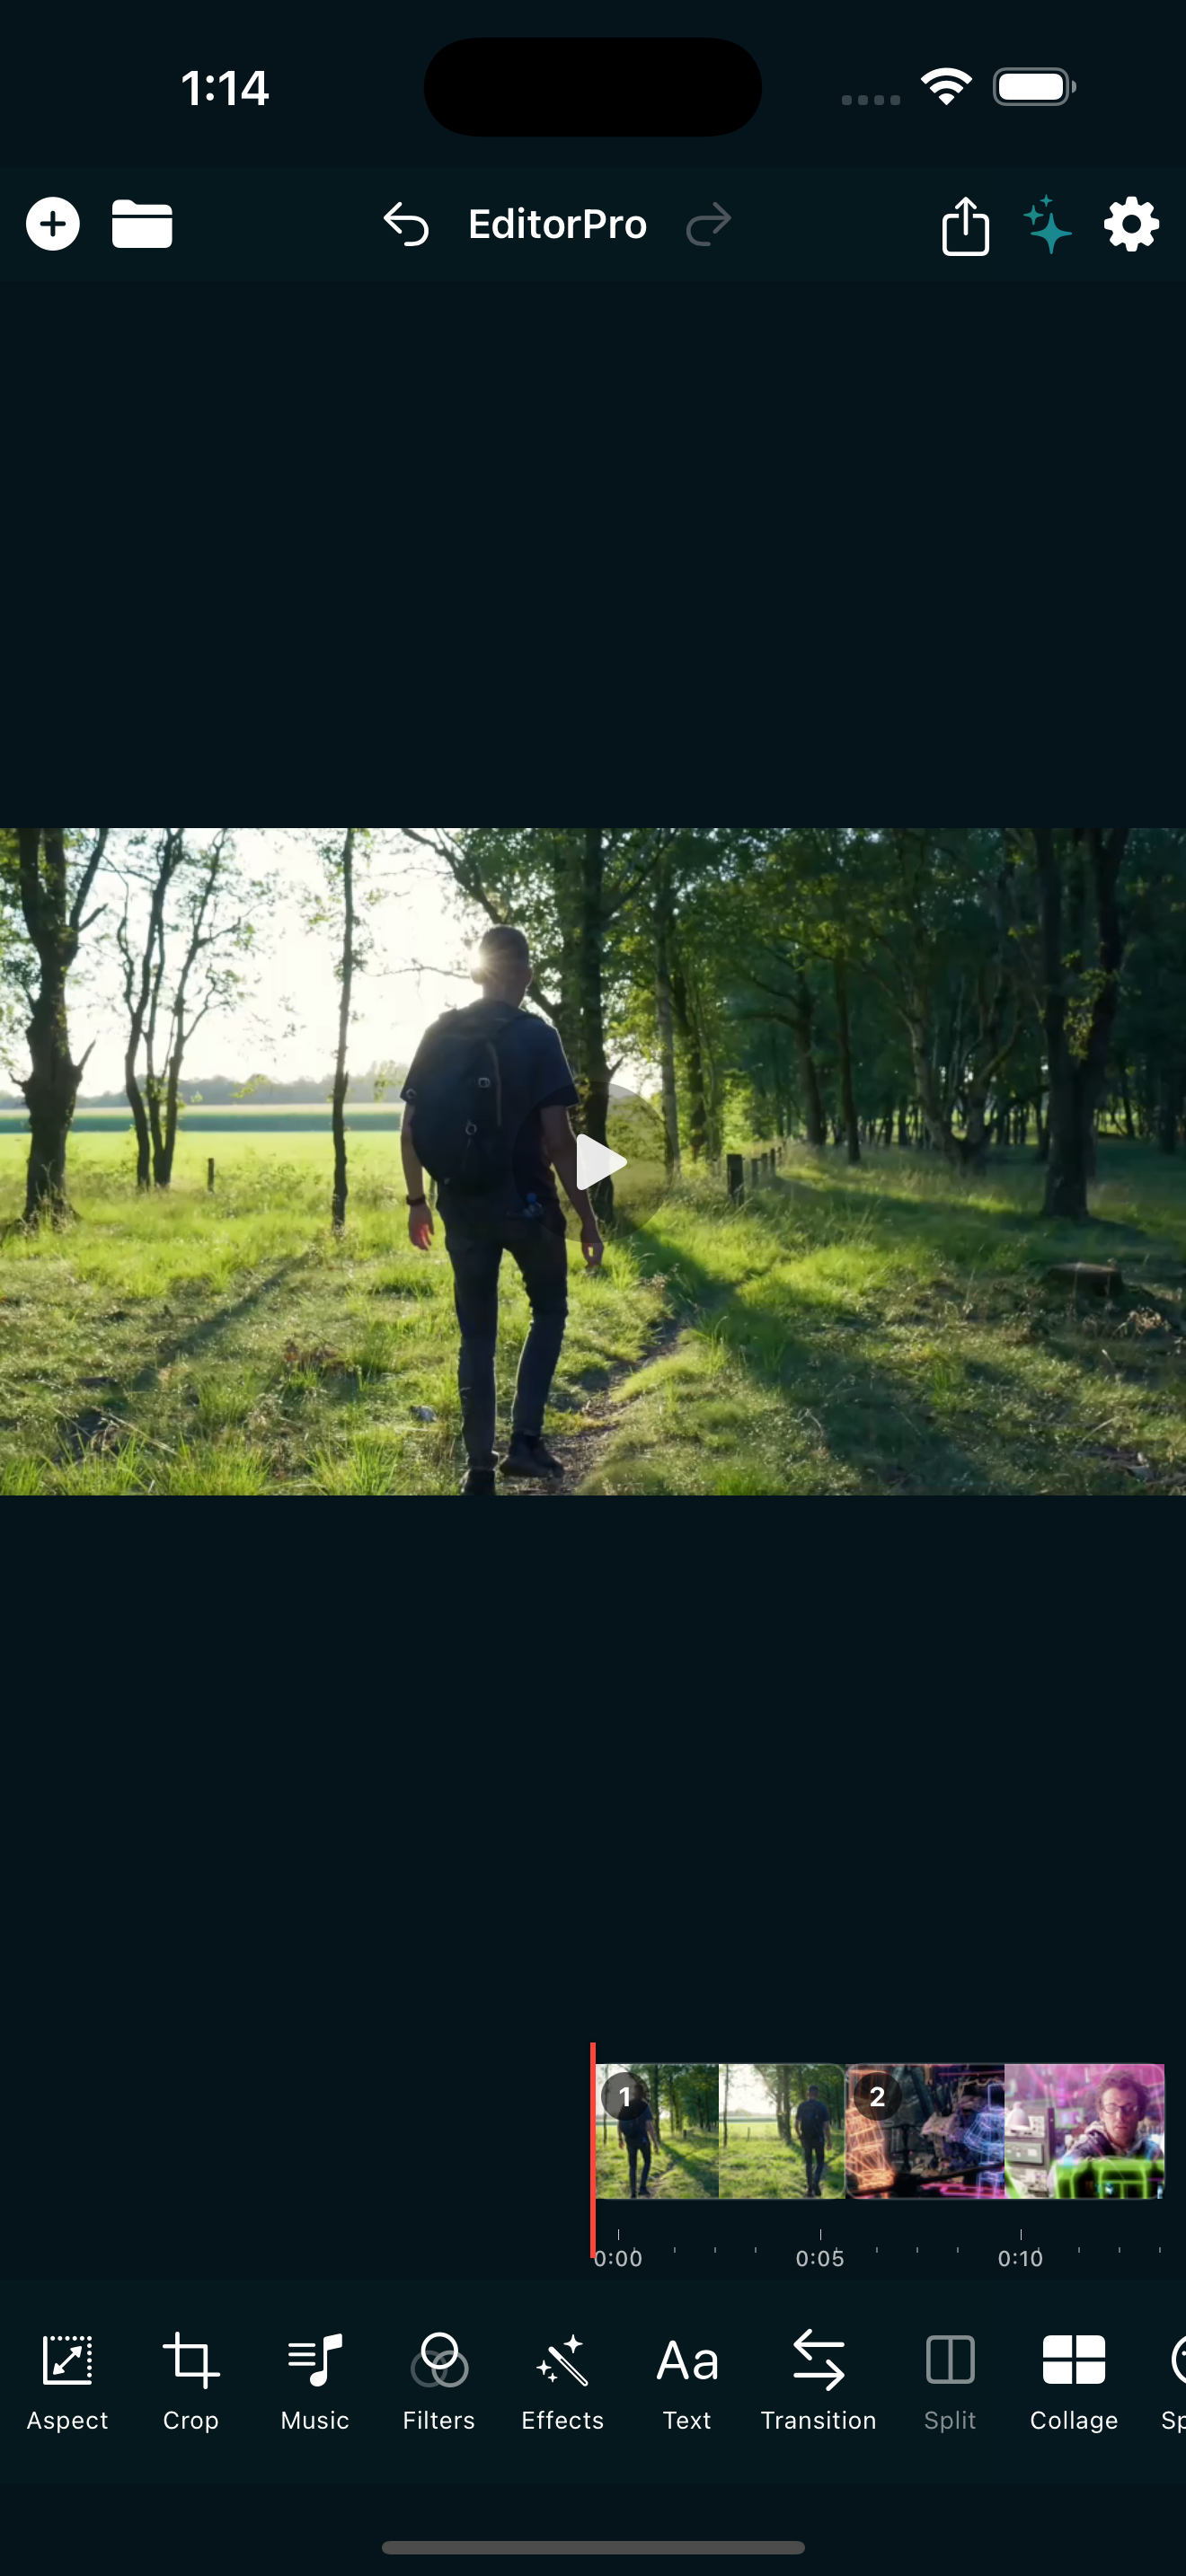
Trimming and splitting are the two most fundamental things you do when editing a video. You trim to remove the messy beginnings and endings of a clip. You split to cut a long clip into shorter pieces, remove a section in the middle, or rearrange the order. Together, these two actions are the backbone of every edit you will ever make.
If you have never trimmed or split a video on your iPhone before, the good news is that it is straightforward once you know where the tools live. This guide walks through the entire process using EditorPro, a free iPhone video editor with a simple timeline. Everything here uses the exact labels you see in the app, so you can follow along tap for tap.
Trim vs. split: what is the difference?
Before getting into the steps, it helps to understand what each tool does and when to reach for it.
- Trim shortens a clip by adjusting its start or end point. Use it to cut off a shaky opening, a boring intro, or a clip that runs too long. The clip stays as one piece, just shorter.
- Split cuts a single clip into two separate clips at the playhead position. Use it when you want to remove something in the middle of a clip, insert a transition, or rearrange sections of a longer recording.
A simple way to remember: trim shrinks the edges, split breaks the middle. Most edits use both.
How to trim a video clip on iPhone
Trimming is the first thing you will do with almost every clip you import. Here is the step-by-step flow:
- Import your video. Open EditorPro and tap the plus icon in the top bar to add a video from your photo library. The clip appears on the timeline.
- Tap the clip on the timeline to select it. Selected clips show trim handles on each side.
- Drag the handles. Pull the left handle to trim the beginning. Pull the right handle to trim the end. You can scrub frame by frame to find the exact point where the action starts or stops.
- Preview the result. Tap play to watch the trimmed clip. If it still feels too long or too short, adjust the handles again.
That is it. The trimmed clip is saved automatically as part of your project. If you trim too much, tap the undo arrow in the top bar to step back.
How to split a video clip on iPhone
Splitting is what you need when a clip has good content at the start and end but something in the middle you want to remove or replace. Here is how to do it:
- Move the playhead to the point where you want the cut. The playhead is the vertical line that shows your current position on the timeline. Drag it left or right to position it.
- Tap Split in the bottom tool strip. The clip is now two separate clips on your timeline, each starting where the other ends.
- Move the playhead again to the end of the section you want to remove, then tap Split once more. You now have three clips, with the middle one isolated.
- Delete the middle clip. Position the playhead on the clip you want to remove and tap Delete. The gap closes automatically.
You can repeat this process as many times as you need. Every split is undoable, so there is no risk in experimenting.
Reordering clips after splitting
Once you have split a longer clip into pieces, you might want to rearrange them. Maybe the best moment is buried in the middle and belongs at the start.
To reorder clips in EditorPro:
- Long-press a clip on the timeline to enter the Clip Manager mode.
- Drag the clip to its new position. The other clips shift to make room.
- Release to drop it in place.
This is especially useful when you are building a highlight reel from a longer recording. Split the footage into segments, delete the parts that do not matter, and drag the best moments to the front.
Extra tools that pair well with trim and split
Trim and split are the starting point. Once your clips are cut to size, a few other tools in the same timeline help you refine the edit further:
- Duplicate copies a clip in place. Use it when you want to repeat a moment for emphasis or create a stutter effect for music videos.
- Speed changes playback rate. Slow a clip to 0.5x for a dramatic moment, or speed it to 2x for a time-lapse feel. Each speed option shows the resulting duration so you can plan your timing.
- Transitions sit at the boundary between two clips. After splitting, add a Cross Dissolve for a smooth blend, or a Whip Pan for an energetic cut. EditorPro includes 37 free transitions.
- Filters apply a color look to any clip. After you split a long clip, you can grade each segment differently to signal a mood shift.
- Volume and Mute let you control audio per clip. Split a clip and mute one half to cut out a cough or a notification sound without losing the whole clip.
All of these tools are free in EditorPro. You can combine them freely, and every action is undoable.
Common trimming mistakes and how to avoid them
Even though trimming and splitting are simple, a few habits will make your edits look noticeably better:
- Trim on action, not on stillness. A cut feels invisible when it happens during motion. If someone is walking, talking, or turning, cut on the movement. Cutting on a static frame makes the edit feel choppy.
- Leave a beat of breathing room. Do not trim so tight that every clip starts the instant something happens. A fraction of a second of lead-in gives the viewer time to register the new shot.
- Split first, then delete. If you are unsure whether you want to keep a section, split around it and leave it in place. You can always delete it later. Deleting first means you have to undo if you change your mind.
- Watch the cut points. After every trim or split, play through the edit point at normal speed. If it feels abrupt, adjust the handles by a few frames. Small tweaks make a big difference.
- Avoid cutting mid-word. If someone is speaking, make sure your split does not chop a sentence in half. Move the playhead to the pause between words.
Putting it all together
A typical editing session on iPhone looks something like this:
- Import your clips.
- Trim each clip to remove dead air at the start and end.
- Split long clips at natural break points: scene changes, topic shifts, or moments of silence.
- Delete the sections you do not need.
- Reorder the remaining clips to tell your story.
- Add transitions between clips for smooth (or energetic) cuts.
- Export and share.
This workflow works for everything from a 15-second Reel to a five-minute vlog. The tools are the same. The only thing that changes is how many clips you are working with.
When you are ready to export, EditorPro gives you three free quality options: Web Share (720p), 720p HD, and 1080p HD. Free exports include a small watermark. If you post frequently and want watermark-free output or 4K resolution, EditorPro Pro removes those limits for $2.99/month or $14.99/year (with a 7-day free trial on the annual plan).
Want to see these techniques in action with a different angle? Check out our guide on how to slow down a video on iPhone for speed ramps after you split, or our guide to adding transitions for smooth cuts between split clips.
Start editing your videos today
EditorPro gives you a full timeline with trim, split, reorder, and 37 transitions right on your iPhone. Free to download, no account needed.
Download on the App Store