
How to Slow Down a Video on iPhone
Slow motion is one of the most powerful tools in a video editor's toolkit. A deliberate slow-down can turn an ordinary moment into something cinematic, draw attention to a detail people would otherwise miss, or give a Reel the dramatic punch that makes viewers watch it twice. The good news: you do not need a desktop editor or a special camera to do it. Your iPhone and the right app are enough.
This guide covers why slow motion works, how to slow down a video on iPhone step by step, and how to combine slow and fast clips into a speed ramp that keeps viewers hooked.
Why slow down a video?
Speed is a storytelling lever. When you slow a clip down, you give the audience time to absorb what is happening. That matters for a few common scenarios:
- Action highlights. A skate trick, a wave crashing, a basketball dunk: slow-mo lets the viewer appreciate the motion instead of blinking past it.
- Emotional beats. A smile, a reaction, a toast at a wedding. Slowing these down makes the feeling linger.
- Product reveals. Unboxing and product shots look intentional and polished at half speed.
- Pacing variety. A feed full of same-speed clips gets monotonous. Throwing in a slow-mo section breaks the rhythm in a good way.
The key is restraint. Slow the whole thing down and it drags. Slow the right two seconds and it pops.
How to slow down a video on iPhone, step by step
EditorPro has a built-in Speed tool that makes this straightforward. Here is the full process.
1. Import your clip
Open EditorPro, create a new project, and tap the + button in the top bar to add a video from your photo library. You can bring in multiple clips if your project has more than one.
2. Select the clip and open Speed
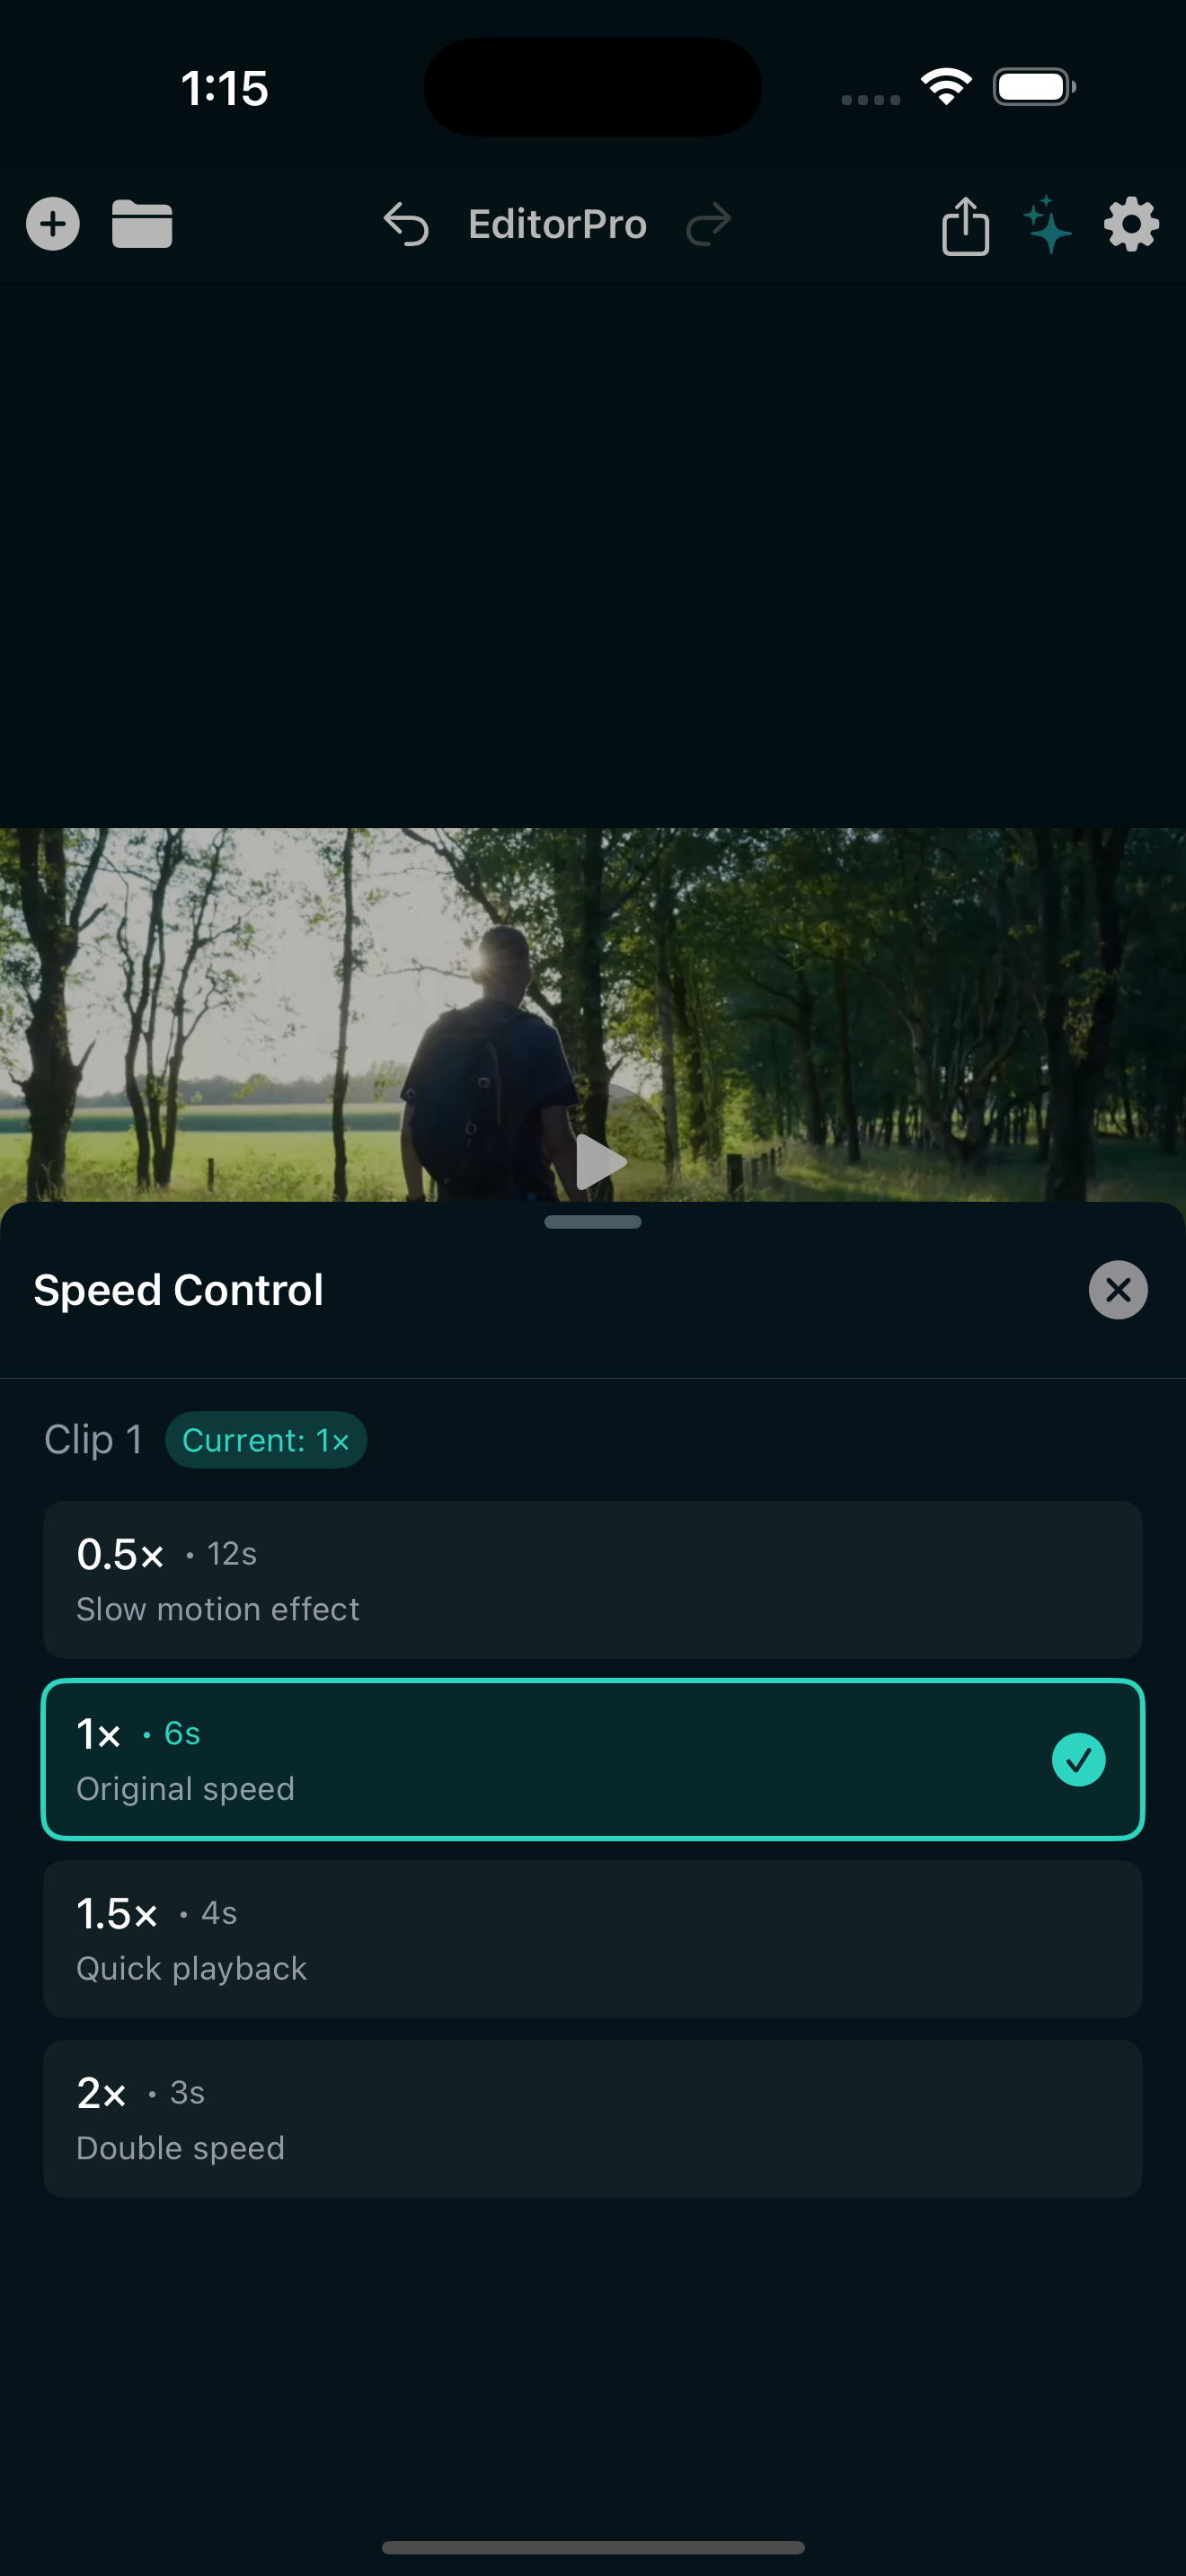
Tap the clip on the timeline so it highlights, then tap Speed in the bottom tool strip. The speed panel slides up with five presets:
- 0.5x (Slow): half speed, the clip plays twice as long
- 1x (Normal): original speed
- 1.5x (Fast): speeds up the clip by 50%
- 2x (Double): twice as fast
Each preset shows the resulting duration next to it, so you know exactly how long the slowed or sped-up clip will be before you commit.
3. Apply the speed change
Tap 0.5x (Slow) and the clip instantly becomes half speed. The timeline stretches to show the new, longer duration. You can preview it right away by pressing play.
If you only want part of the clip in slow motion, first split the clip at the points where you want the slow section to start and end. Use the Split tool (tap the clip, then Split) to cut at the playhead. Then select just the segment you want to slow down and apply 0.5x to that piece alone. The rest of your video stays at normal speed.
4. Preview and adjust
Play through the slow-motion section and check the timing. If it feels too long, consider trimming the slowed clip or bumping it up to 1x somewhere in the middle. You can undo any speed change with the undo arrow in the top bar, so experiment freely.
Building a speed ramp: slow to fast and back
A speed ramp is when a video transitions from one speed to another within the same clip. It is the technique behind those Reels that start slow, accelerate into real-time, then slow down again at the end. It keeps viewers watching because the pace is always shifting.
Here is how to build one on iPhone:
- Split your clip into segments. Place the playhead where you want the first speed change to happen and tap Split. Move to the next transition point and split again. Repeat until you have three or four segments.
- Set each segment to a different speed. Tap the first segment, open Speed, and set it to 0.5x (Slow). Tap the middle segment and leave it at 1x (Normal) or push it to 1.5x (Fast). Tap the last segment and set it back to 0.5x.
- Add a transition between segments. Tap Transition in the bottom tool strip, pick a quick dissolve like Cross Dissolve or a punchy one like Whip Flash, and set the duration to about 0.3 to 0.5 seconds. Apply it between each pair of speed-changed clips. This smooths the jarring cut from slow to fast and back.
- Preview the full sequence. Press play and watch the whole thing. A good speed ramp should feel like a single, flowing motion rather than a patchwork of different speeds.
Pairing slow motion with filters and effects
Slow motion on its own is effective, but combining it with the right visual treatment makes it stand out even more. A few combinations that work well:
- Slow-mo + Cinematic Noir. The Noir filter from the Cinematic category adds contrast and drama that pairs naturally with a half-speed highlight. It turns a simple slow clip into something that looks like a movie scene.
- Slow-mo + Dreamy or Ethereal. These Mood filters soften the image slightly, which feels right for emotional slow-motion moments like a reaction or a sunset.
- Slow-mo + a Zoom In effect. Adding the Zoom In effect from the Transform category on top of a 0.5x speed clip creates a gradual push-in that feels dramatic without any manual keyframing.
- Slow-mo + Shake effect. For action or sports clips, the Shake effect from the Camera category at low intensity adds energy to an already-dramatic slow section.
To apply a filter, select the clip and tap Filters in the bottom tool strip. To add an effect, select the clip and tap Effects. You can layer up to five effects on a single clip, so you have room to experiment.
Slow motion for different platforms
Where you post matters. A few platform-specific tips:
- Instagram Reels and TikTok: Use a 9:16 (Portrait) aspect ratio. Keep your slow-mo section short, ideally under three seconds, because viewers on these platforms scroll fast. Pair it with a beat drop or sound effect from the built-in audio library for extra impact. Check out how to make a video vertical for Reels and TikTok for the full setup.
- YouTube Shorts: Same vertical format, but you can hold the slow motion a beat longer since YouTube viewers tend to watch slightly longer clips.
- Standard YouTube or film: Use 16:9 (Landscape) or Cinematic (21:9) for a wider canvas. Slow motion is more forgiving here because viewers are already in a lean-back watching mode.
Common slow-mo mistakes (and how to avoid them)
- Slowing low-frame-rate footage. If your original clip was shot at 30 fps, slowing it to 0.5x means each frame is on screen for twice as long and the result looks choppy. For the smoothest slow motion, shoot at 60 fps or higher in your iPhone Camera settings before you edit.
- Overusing slow-mo. One or two slow sections in a 30-second Reel is plenty. More than that and the pacing becomes predictable instead of surprising.
- Forgetting audio. When you slow a clip, the audio stretches too and sounds distorted. Mute the slowed clip with the Mute button and drop in a sound effect or background music track from the Music panel instead. See how to add music to a video on iPhone for detailed steps.
- Not trimming the slow section tight. Slow motion adds seconds. A two-second clip at 0.5x becomes four seconds, which can throw off the timing of your whole edit. Always preview the full video after slowing a segment.
Exporting your slow-mo video
When your edit is ready, tap the share icon in the top toolbar and choose your quality. EditorPro offers 720p, 1080p, and (with Pro) 4K export. For most social media, 1080p is the sweet spot. If you want the highest quality with no watermark, Pro removes it entirely.
Every filter, effect, and speed change you applied is baked into the final file. Your video saves directly to your Photos app, ready to share wherever you want.
Try slow motion on your next video
EditorPro gives you built-in speed controls, 138 filters, and 24 effects in a free iPhone editor. Slow a clip, add a cinematic filter, and export in seconds.
Download on the App Store