How to Make a Vlog on iPhone
Vlogging on iPhone is easier than it has ever been. The camera in your pocket shoots great footage, and you no longer need a desktop editor to turn raw clips into something people actually want to watch. Whether you are documenting a day trip, a workout routine, or a behind-the-scenes look at your work, the process comes down to three things: shooting with intent, trimming the boring parts, and adding just enough polish to keep viewers hooked.
Here is a practical guide to making a vlog on iPhone, from capture to final export, with tips that work whether you are posting to YouTube, Reels, or TikTok.
1. Shoot in clips, not one long take
The biggest beginner mistake is hitting record and talking for five minutes straight. A vlog is not a single take. It is a collection of short, purposeful clips stitched together. Aim for 5 to 15 seconds per shot. If you catch yourself going longer, plan to trim it down later.
- Vary your angles. A wide establishing shot, a medium shot of you talking, and a close-up detail shot give the viewer visual variety.
- Shoot in the right orientation. Vertical (9:16) for Reels and TikTok, horizontal (16:9) for YouTube. Decide before you start filming.
- Get enough B-roll. Short clips of your surroundings, your hands, a sign, a street, anything that shows context. B-roll is what makes a vlog feel edited rather than just a stream of talking.
- Lighting matters more than gear. Face a window or shoot outdoors. Natural light almost always looks better than indoor bulbs.
2. Import and arrange your clips
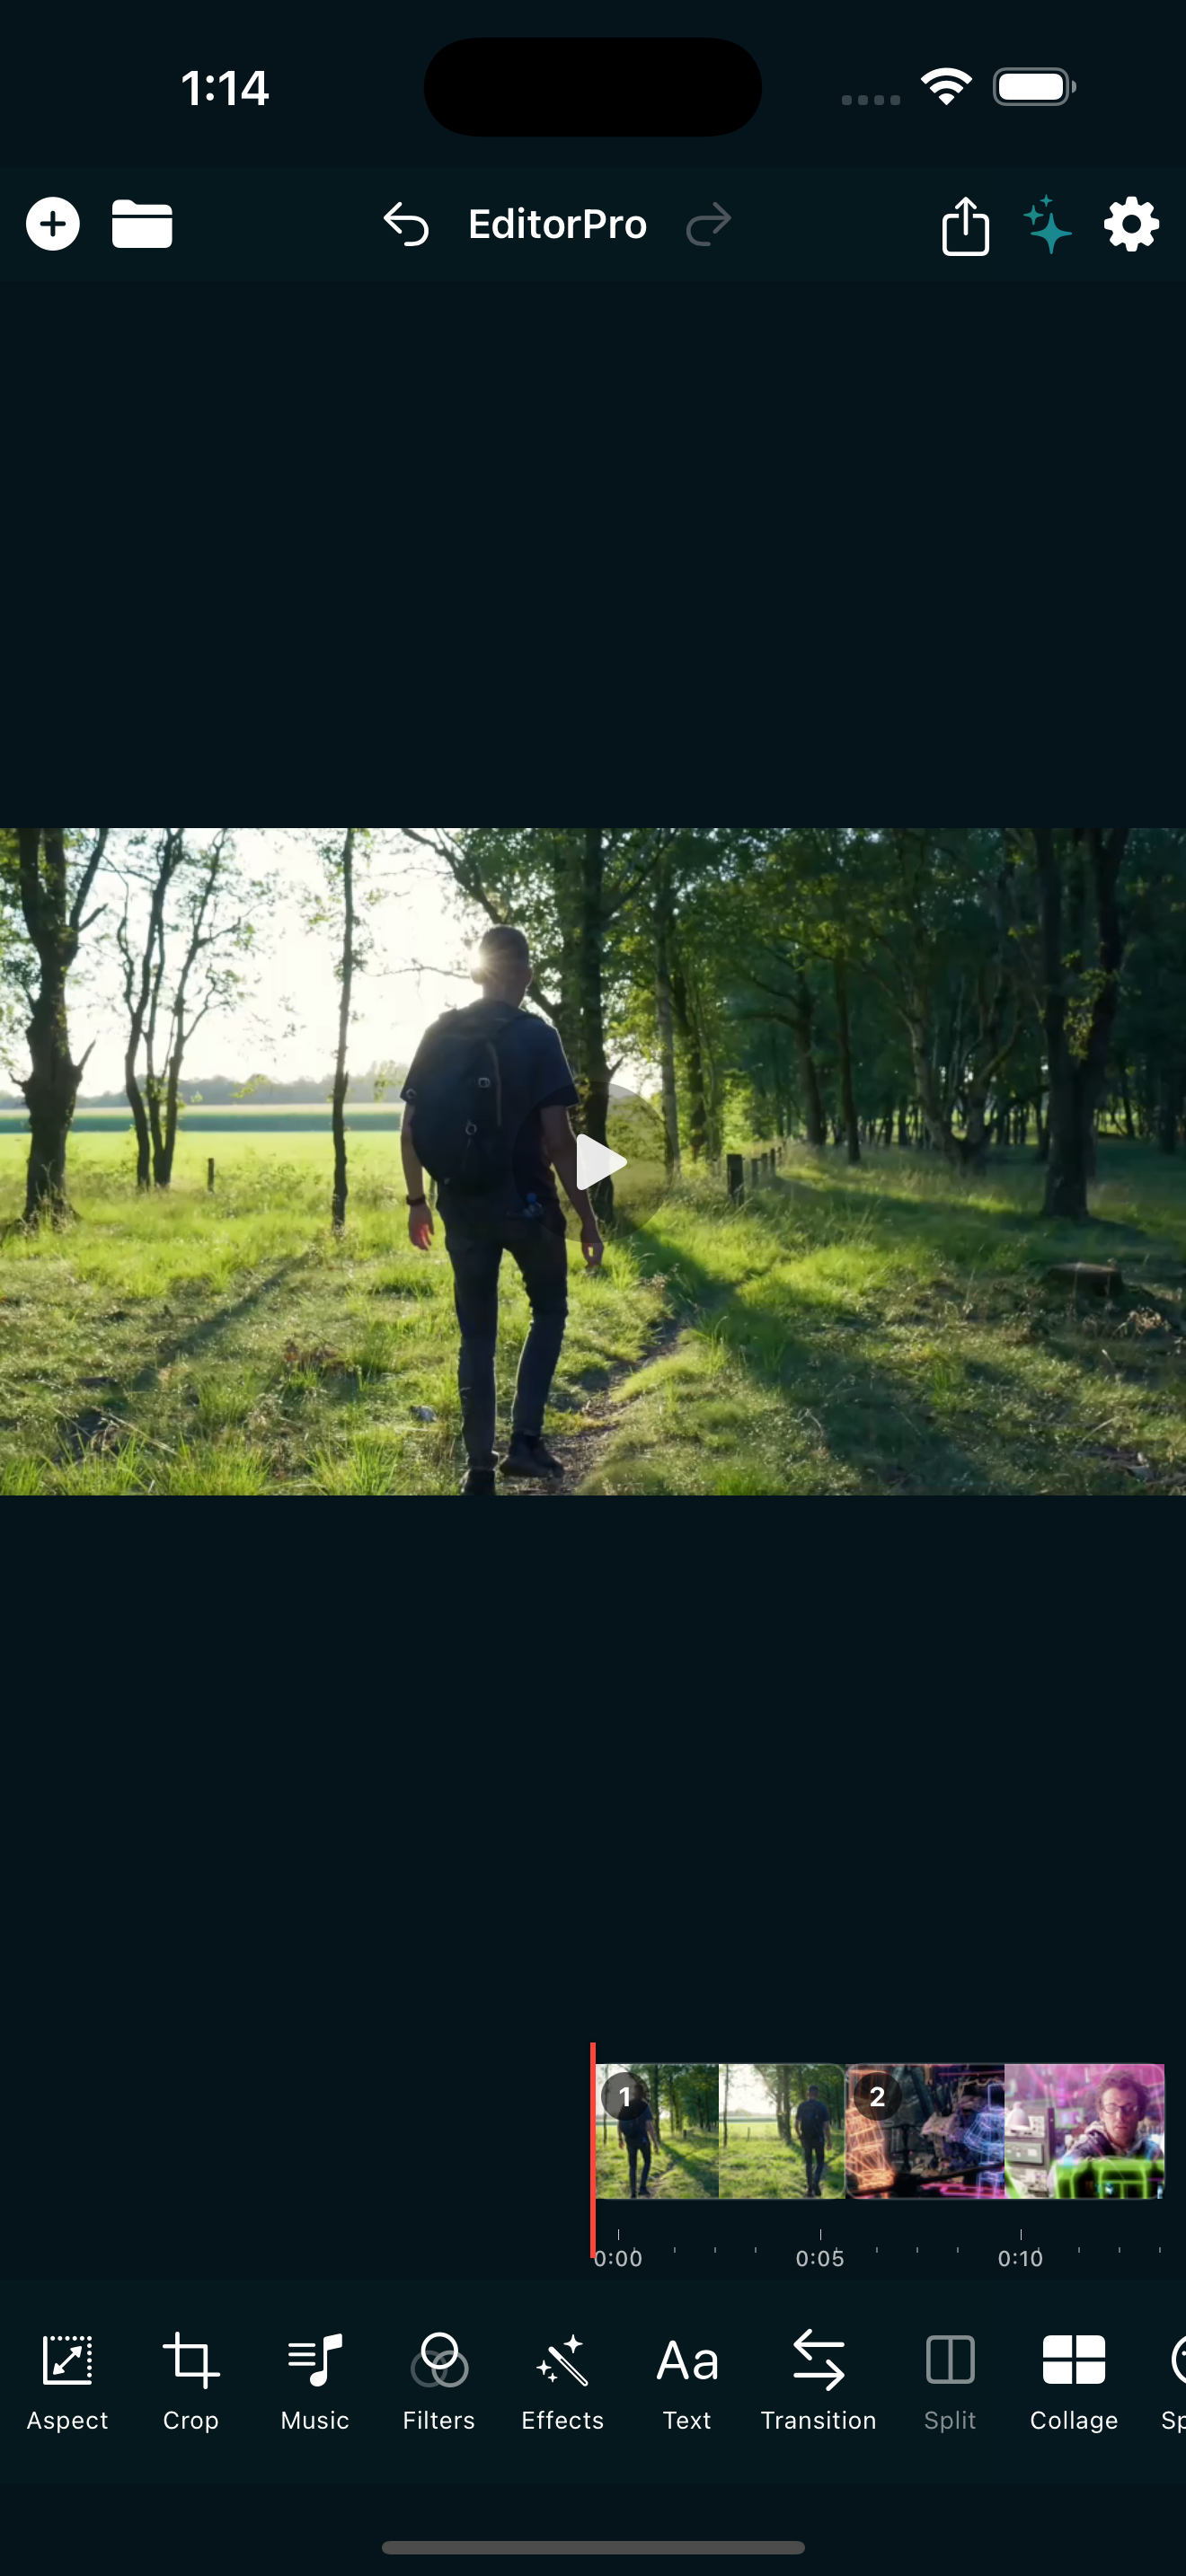
Once you have your footage, open EditorPro and tap the + button to import your clips. You can add up to 10 items at a time. Photos automatically become 5-second clips, which is handy if you want to mix in still images with your video.
Arrange your clips in order by long-pressing and dragging them on the timeline. Think about the flow: lead with something that grabs attention in the first 3 seconds, then build your story from there. A good vlog does not need to be chronological. Starting with a teaser or a striking shot can pull viewers in faster than a slow intro.
3. Trim the fat
This is where most vlogs either get better or fall flat. Every clip has a few seconds at the start and end that do not need to be there: the moment before you start talking, the pause after you finish, a bit of camera shake as you reach for the stop button.
Tap any clip and drag the trim handles to tighten it up. If a clip is too long in the middle, use Split to cut it at the playhead and remove the dead section. The goal is to keep every second earning its place. If nothing happens in a clip for more than 2 or 3 seconds, cut it or shorten it.
For more on this, see our guide on how to trim and split a video on iPhone.
4. Add transitions between clips
Transitions help the viewer move from one shot to the next without feeling a jolt. You do not need one between every clip. Sometimes a hard cut is the right choice. But for moments where the scene changes, a subtle transition helps.
Tap Transition in the bottom tool strip, then choose Transition In or Transition Out. A few that work well for vlogs:
- Cross Dissolve for a smooth, invisible shift between scenes.
- Fade to Black for a chapter break or a time skip.
- Whip Pan Right or Whip Pan Left for an energetic jump, great for travel vlogs.
- Light Leak for a warm, nostalgic feel.
Set the duration for each transition. The default is 1 second, but 0.3 to 0.5 seconds often feels more natural for fast-paced vlogs. You can apply a transition to a single clip or to all clips at once.
5. Pick a filter that sets the tone
A filter gives your vlog a consistent look. Tap Filters and browse by category. For vlogs, a few categories stand out:
- Mood filters like Dreamy, Moody, or Calm add an emotional wash without overpowering the image.
- Cinematic filters like Indie or Documentary give a film-like quality for storytelling vlogs.
- Social filters like Reels Magic or Story Glow are tuned for vertical content on Instagram and TikTok.
Use the intensity slider to dial the effect up or down. A common mistake is going too strong. Somewhere between 30 and 60 percent usually looks natural. You can apply a filter to one clip or toggle the scope to apply it across all clips for a consistent grade.
6. Add background music
Music is the fastest way to change how a vlog feels. Tap Music in the bottom tool strip, then switch to Background Music. EditorPro includes 9 background tracks across different genres: upbeat, romantic, mysterious, and more.
Position the track where you want it, set the volume so it sits under your voice, and use fade in and fade out so the music does not start or stop abruptly. If your clips have their own audio, you can mute individual clips or lower their volume so the music does not compete with speech.
You can also add sound effects from the built-in library: a whoosh for transitions, a camera flash for photo moments, or a notification ding for a comedic beat. There are 44 sound effects to choose from.
7. Add text for context
A short text overlay at the start of your vlog tells viewers what they are about to watch. Tap Text and type a title, a location, or a date. Pick from 13 built-in styles like Plain, Neon, Typewriter, or Shadow. Position it by dragging on the preview, pinch to resize, and set the start time and duration so it appears and disappears at the right moment.
Text is also useful for calling out key moments: "the best part," "wait for it," or a quick label on a B-roll shot. Keep it short and let the video do the talking.
8. Export and share
When your vlog is ready, tap the share icon in the top toolbar. Choose your quality: 720p and 1080p are free, and 4K is available with Pro. If you are posting to Reels or TikTok, make sure your aspect ratio is set to 9:16 before you export so the video fills the screen. You can check this by tapping Aspect and selecting Portrait (9:16).
For a step-by-step on getting the right format, see how to make a video vertical for Reels and TikTok.
Free exports include a small watermark in the bottom-right corner. If you are publishing regularly, upgrading to Pro removes the watermark and unlocks 4K export, unlimited Auto Reel, and unlimited AI assistant. Pro is $2.99 per month or $14.99 per year with a 7-day free trial on the annual plan.
Quick vlog checklist
- Shoot short clips (5 to 15 seconds each) with varied angles.
- Capture B-roll for context and visual interest.
- Trim every clip to its best moments. Cut the dead air.
- Add subtle transitions where scenes change.
- Apply one filter across all clips for a consistent look.
- Lay in background music and adjust volume so speech is clear.
- Add a text title at the start and labels where helpful.
- Export in the right aspect ratio for your platform.
The best way to get better at vlogging is to keep making them. Your first vlog does not need to be perfect. It needs to be finished. Shoot something today, trim it down, add music, and share it.
Start vlogging with EditorPro
EditorPro gives you the timeline, filters, transitions, music, and text tools to turn raw clips into a vlog worth watching. Free to download, made for iPhone.
Download on the App Store