How to Add Effects to a Video on iPhone
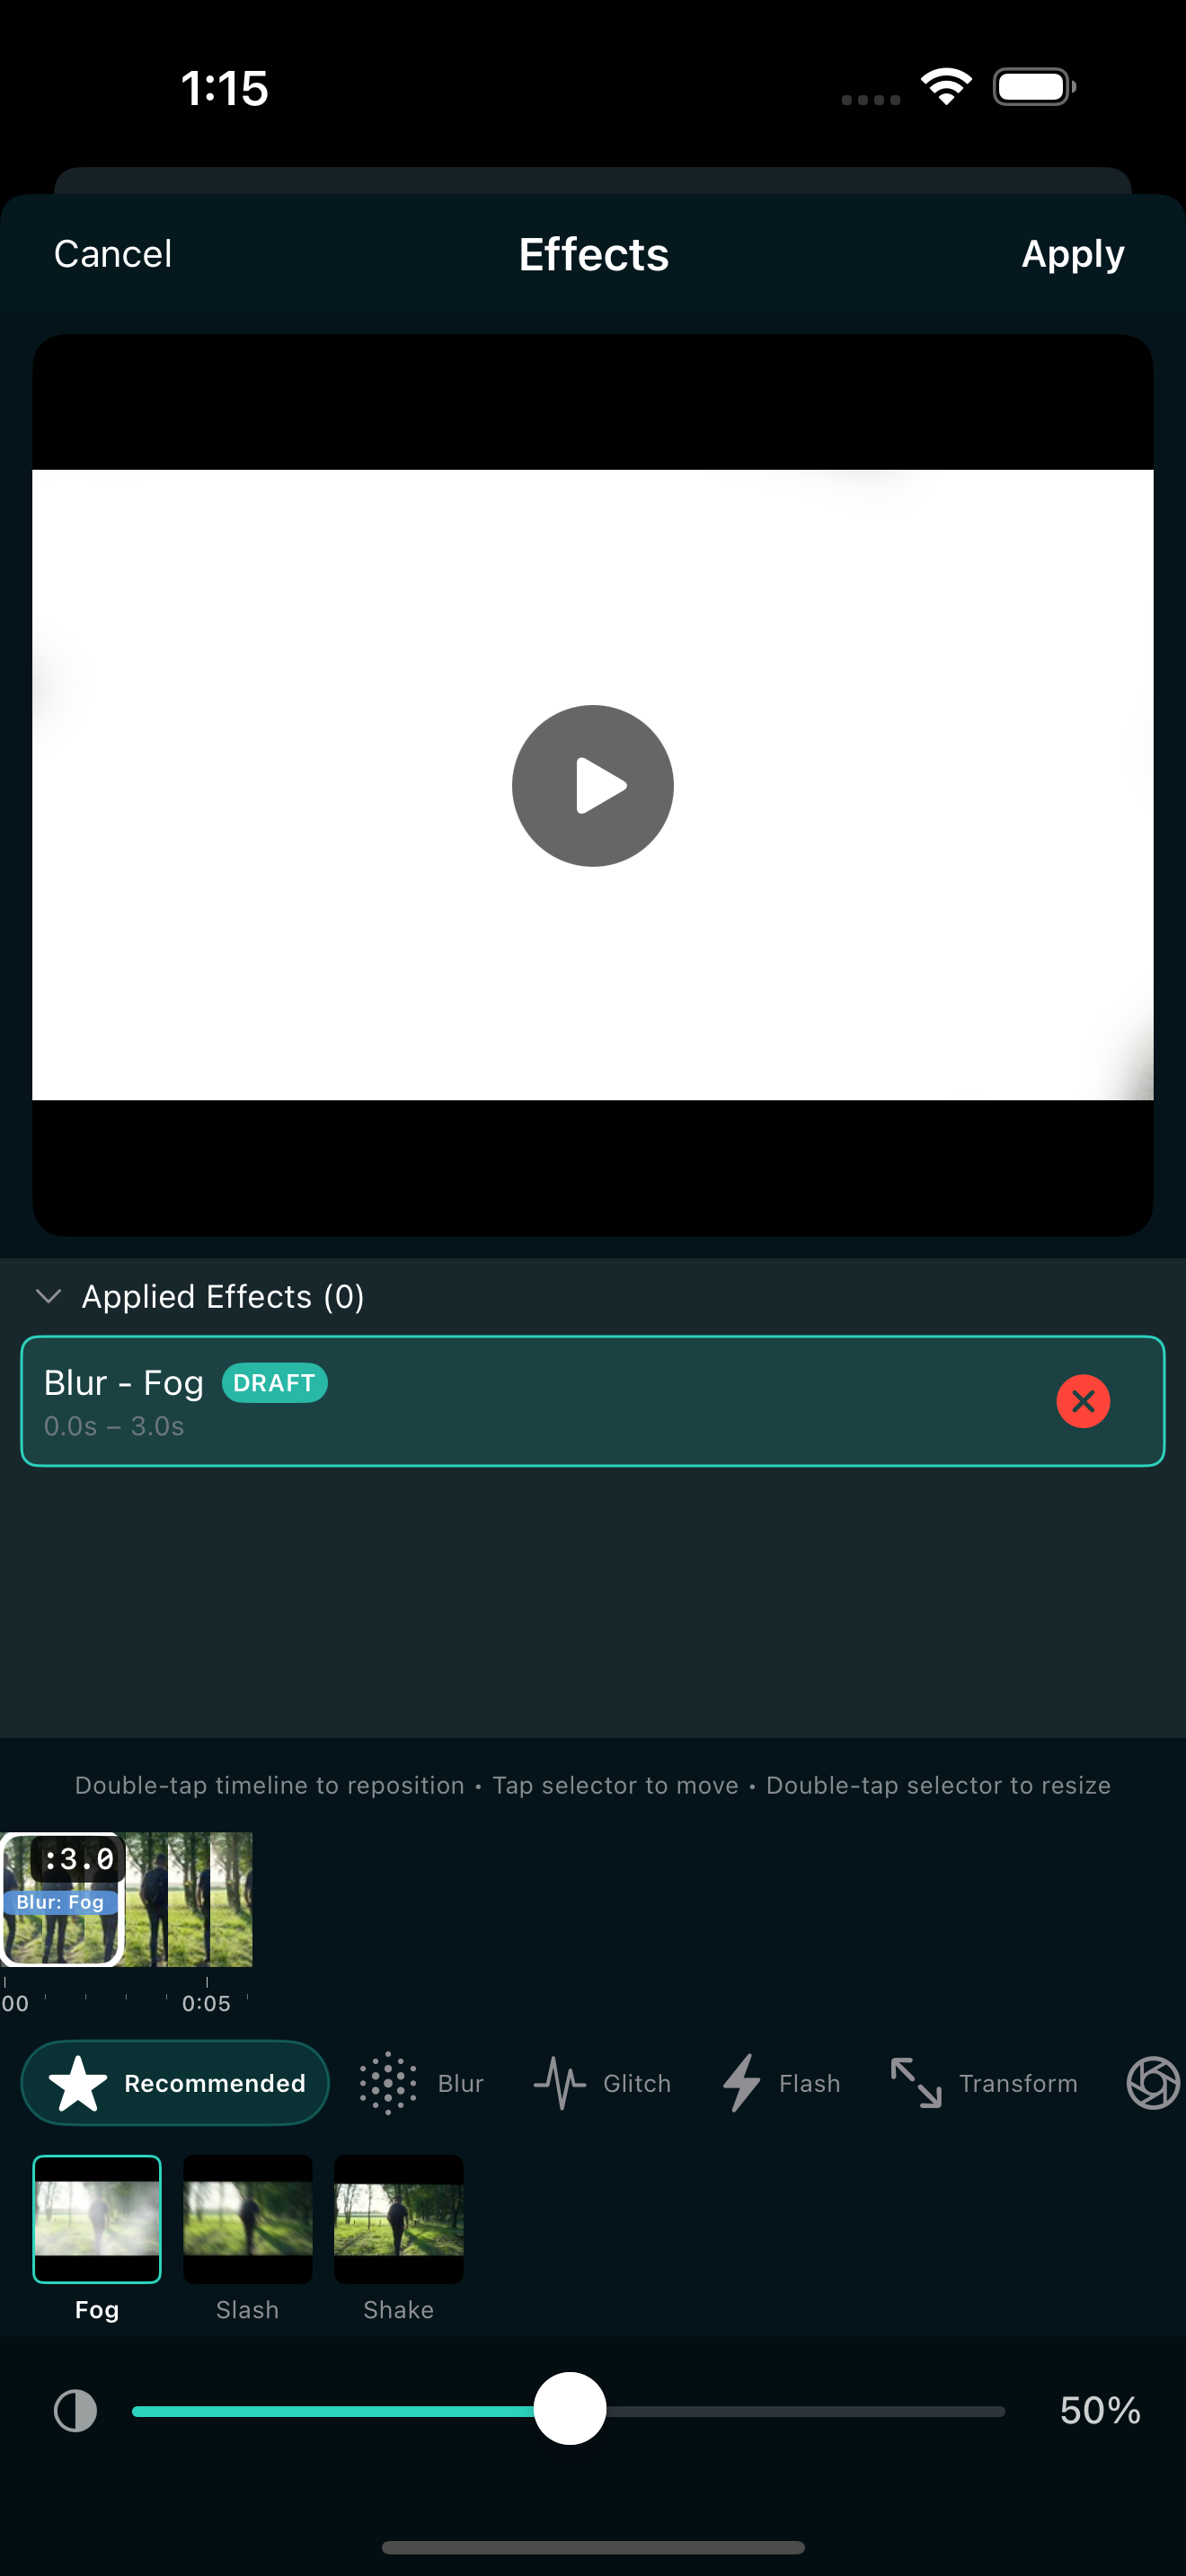
Adding effects to a video on iPhone is one of the quickest ways to make a clip feel intentional and polished. Whether you want a retro VHS look, a glitchy transition, a camera shake on a beat drop, or a tilt-shift miniature effect, you can do it all without leaving your phone. In this guide, you will learn how to add effects to a video on iPhone using EditorPro, which ships with 24 built-in effects across seven categories.
What are video effects?
Effects are visual treatments you apply to a clip to change its look or add motion. They are different from transitions, which sit between two clips, and different from filters, which adjust color and tone. Effects modify the frame itself: blurring it, pixelating it, shaking it, zooming it, or adding glitch artifacts.
In EditorPro, you can add up to five effects per clip, each with its own timing window and intensity setting. That means you can stack a subtle blur with a zoom-in and a scan-line overlay, all on the same clip, timed to different moments.
The 24 effects in EditorPro
EditorPro groups its effects into seven categories. Here is what each one covers:
Blur (5 effects)
Blur, Slash, Radial, Fog, and Tilt-Shift. These range from a full-frame blur to a localized fog or bokeh blur. Tilt-Shift is especially fun for making wide scenes look like miniature models. Each has an intensity slider so you can go subtle or strong.
Glitch (4 effects)
RGB Split, VHS, Scan Lines, and Pixelate. These are the effects to reach for when you want a retro, damaged, or cyberpunk vibe. RGB Split separates the color channels for that classic chromatic aberration look. VHS adds tracking lines and color noise. Scan Lines mimic an old CRT monitor. Pixelate breaks the image into blocky squares.
Flash (2 effects)
Blink and Thunder. These create quick bursts of light or darkness. Use Blink for a strobe effect on a beat, or Thunder for a dramatic flash that pairs well with a sound effect.
Transform (6 effects)
Zoom In, Zoom Out, Pan Right, Pan Left, and Rotate. These add motion to a static clip. A slow zoom-in builds tension. A quick pan adds energy. Rotate spins the frame for a disorienting transition moment. Most have intensity control; Rotate does not.
Camera (3 effects)
Shake, Float, and Bounce. These simulate camera movement. Shake is perfect for music videos and action clips. Float gives a gentle drifting sensation. Bounce adds a playful up-and-down motion. All three have intensity sliders, so you can keep it subtle or push it to an extreme.
Stylize (4 effects)
Prism, Duotone, Duotone Reverse, Invert, and Invert Reverse. Prism splits light into a rainbow fringe. Duotone maps the image to two colors for a bold graphic look. Invert flips the colors to their opposites. These are creative tools for music videos, abstract sequences, or eye-catching Reels.
How to add an effect step by step
- Open your project in EditorPro and tap the clip you want to affect on the timeline.
- Tap Effects in the bottom tool strip.
- Browse the categories (Blur, Glitch, Flash, Transform, Camera, Stylize) and tap an effect to preview it on your clip.
- Use the intensity slider to dial in how strong the effect looks. Most effects support this; a few like Rotate and the Duotone variants have a fixed look.
- Set the start and end timing for the effect. You do not have to apply it to the entire clip. For example, you can have a glitch effect kick in for just the last two seconds of a clip.
- Tap to apply. The effect is added to the clip and visible on the timeline.
You can repeat this process to stack up to five effects on the same clip. Each one keeps its own timing and intensity, so you can layer a slow zoom-in with a brief glitch burst and a tilt-shift blur, all timed independently.
Pairing effects with sound
Effects feel much stronger when they sync with audio. A glitch effect hits harder with a glitch sound effect, and a zoom-in feels more deliberate with a cinematic riser. EditorPro has a built-in audio library with 44 sound effects and 9 background music tracks, so you can drop in a whoosh, an impact, or a riser right where the effect happens.
Effects vs. filters: which should you use?
A common question is whether to use effects or filters. They serve different purposes. Filters adjust the color and tone of your clip for a consistent look across your whole video. Effects add motion, distortion, or visual disruption to specific moments. For the best results, start with a filter to set the mood, then add effects on top for emphasis where you need it.
Tips for using effects well
- Less is more. One well-timed glitch hit beats a constant glitch overlay. Use the timing window to restrict effects to specific moments.
- Sync to the beat. If your video has music, time shake, zoom, or flash effects to land on the downbeat. It makes the video feel edited, not random.
- Stack with intention. With up to five effects per clip, you have room to combine. Try a slow zoom with a subtle blur, or a pixelate with an RGB split for a layered glitch look.
- Preview before you commit. Tap an effect to see it on your clip before applying. Try a few options and pick the one that fits.
All 24 effects in EditorPro are free to use. You can add them, adjust intensity, set timing, and preview as much as you like. When you are ready to export, free exports are unlimited with a small watermark. To remove the watermark and unlock 4K export, upgrade to Pro at $2.99/month or $14.99/year with a 7-day free trial on the annual plan.
Start adding effects to your videos
EditorPro gives you 24 built-in video effects on iPhone, all free to use. Download it and try a glitch or zoom effect on your next clip.
Download on the App Store