
How to Combine Videos on iPhone
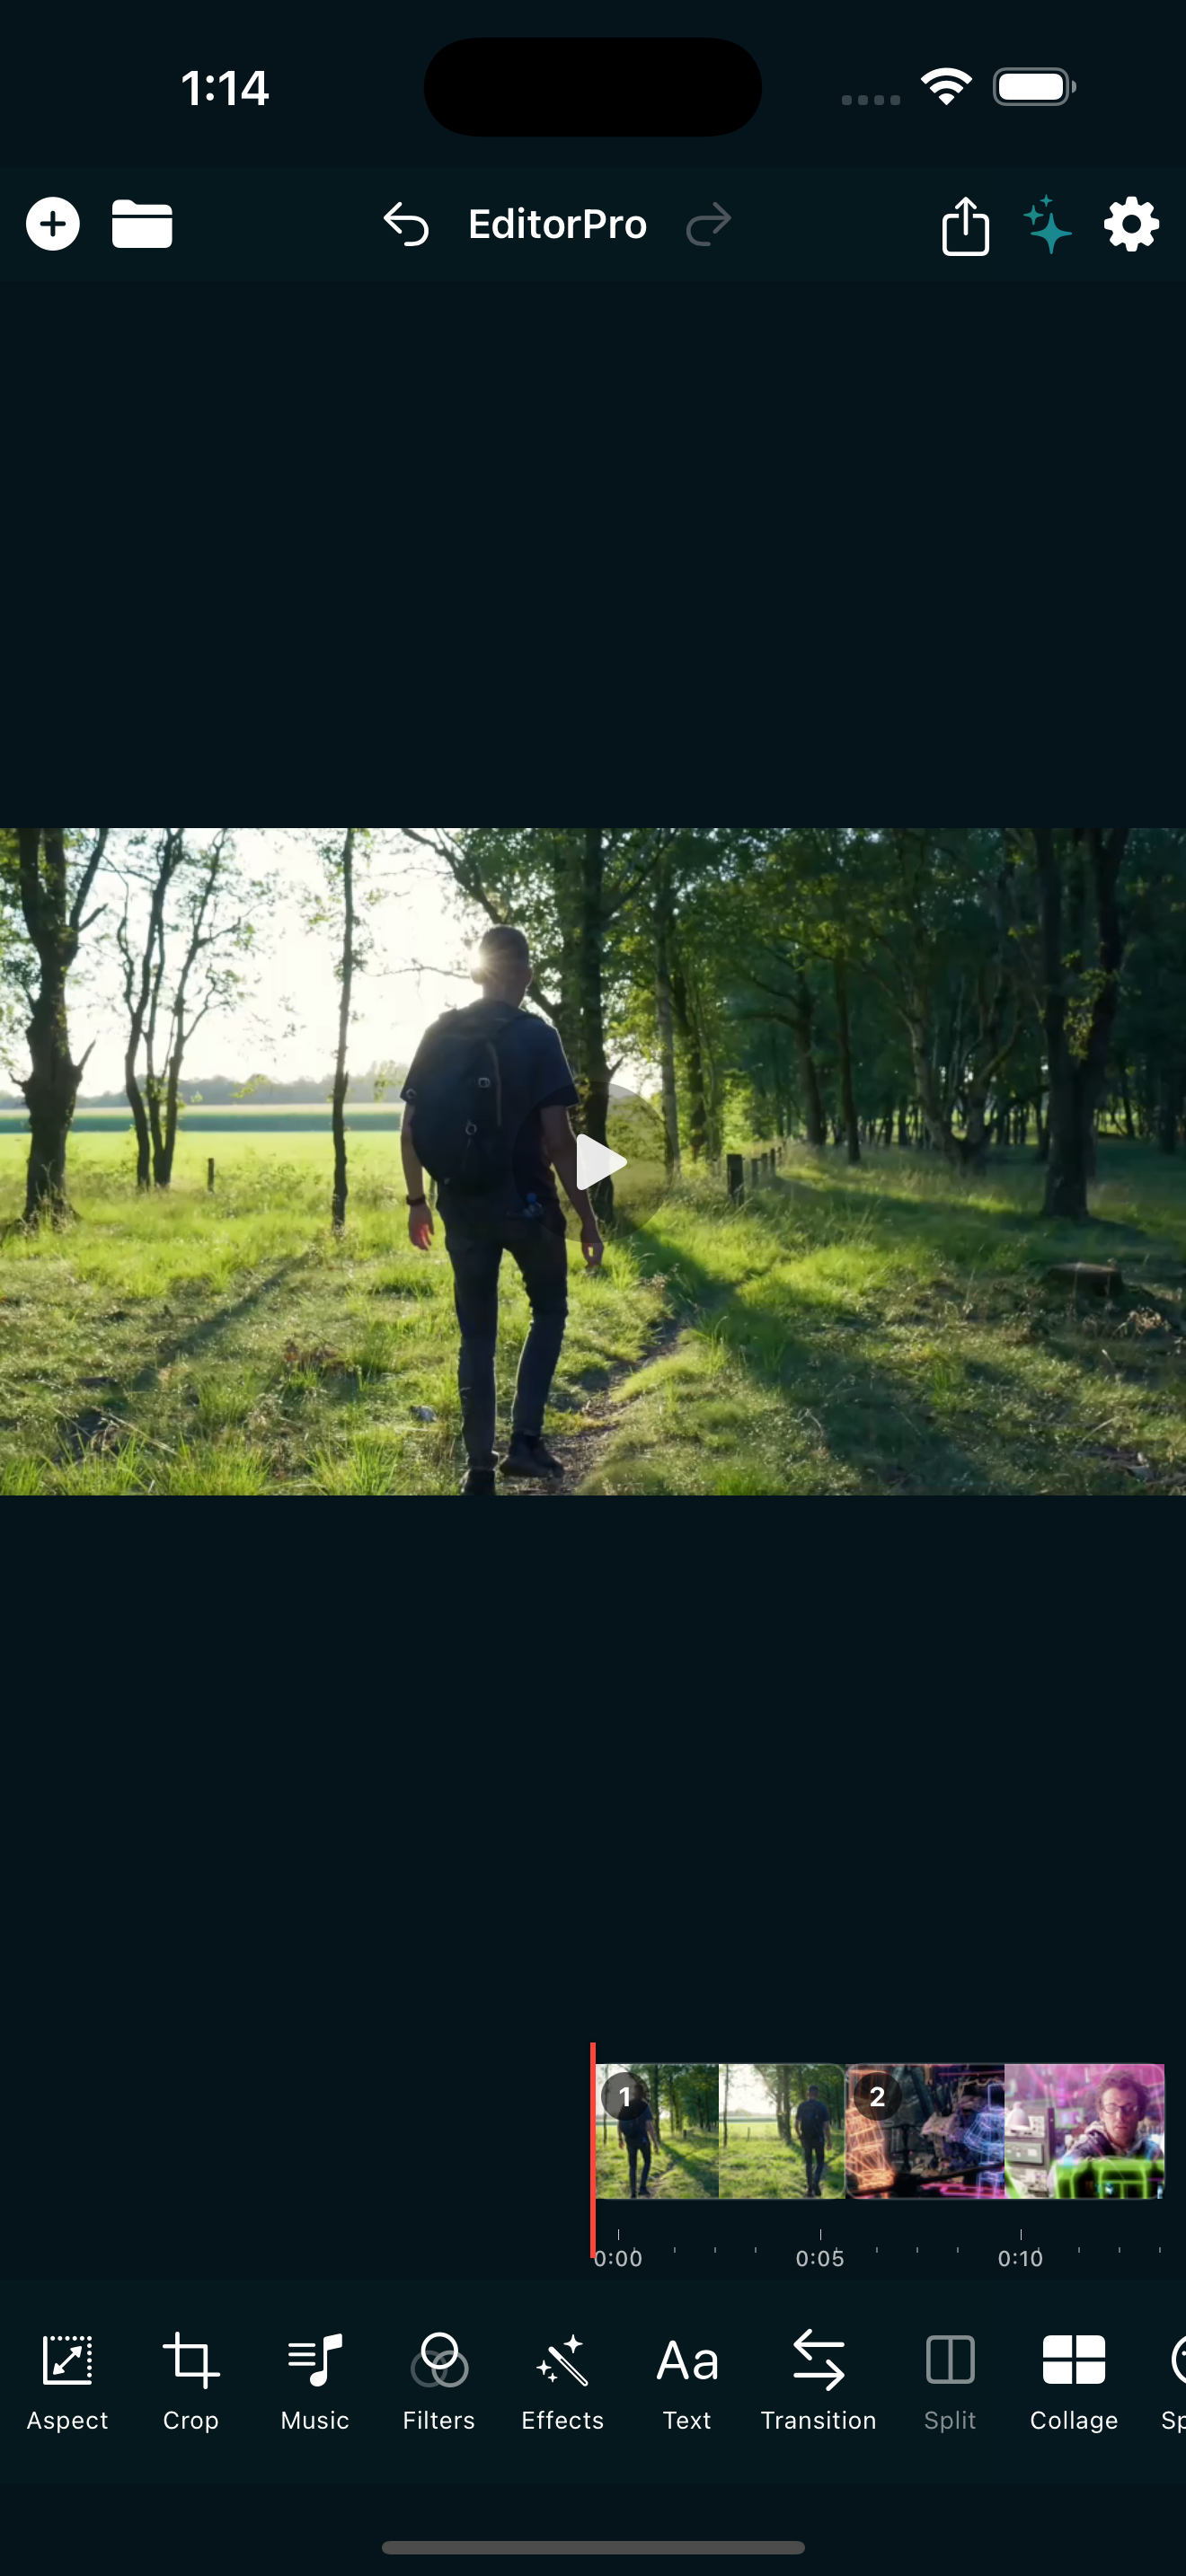
Sometimes one clip is not enough. You filmed a few short clips at a birthday, on a hike, or across a weekend, and now you want to stitch them together into a single video you can share. The good news: you do not need a desktop editor to combine videos on iPhone. You can do it right on your phone, and the result can look just as polished.
Here is a straightforward walkthrough of how to combine multiple videos on iPhone, from importing your clips to exporting one finished file. We will use EditorPro, a free iPhone video editor, as the example tool, but the steps apply to any timeline-based editor that lets you import, trim, and arrange clips.
What you need before you start
Before combining your videos, do a quick prep pass:
- Pick your best clips. You do not need all of them. Five to ten strong clips almost always produce a better video than thirty average ones.
- Note the order. Think about the story or flow: intro, buildup, highlight, closing. A rough order saves time once you are in the editor.
- Check your orientation. If you are combining clips shot in different orientations (vertical and horizontal), decide on a target aspect ratio first. For Reels and TikTok, that is 9:16. For YouTube, 16:9.
Step 1: Import your clips
Open EditorPro and create a new project. Tap the + button in the top toolbar to open the photo picker. You can import up to 10 items at a time, and you can mix videos with photos (photos automatically become 5-second clips). If you have more than 10 clips, import the first batch and then add more with another tap of the + button.
Once imported, your clips appear on a horizontal timeline in the order you selected them. This is your working canvas.
Step 2: Arrange and reorder clips
The order of your clips matters more than any filter or transition. A good sequence tells a story or builds energy. To reorder clips in EditorPro, long-press a clip and drag it to a new position on the timeline. The Clip Manager makes this feel natural, like rearranging icons on your home screen.
If a clip does not belong, tap it and hit Delete. You can always undo if you change your mind, because every edit is non-destructive and fully reversible, even after closing and reopening the app.
Step 3: Trim and split for pacing
Raw clips almost always have dead air at the start or end: a hand walking into frame, a shaky few seconds before the real action, an awkward pause. Trimming those parts is what separates a watchable video from a boring one.
To trim a clip in EditorPro, tap it and drag the handles on either end to set new in and out points. The timeline updates live, so you see exactly where the cut lands.
If you want to use only part of a clip in the middle, use Split. Move the playhead to where you want the cut, tap Split, and the clip becomes two separate clips. You can then delete the part you do not need or move it somewhere else in the sequence. For a deeper look at trimming and splitting, check out our guide on how to trim and split a video on iPhone.
Step 4: Add transitions between clips
Transitions smooth the jump from one clip to the next. Without them, hard cuts can feel abrupt, especially when the lighting or location changes between clips. A simple cross dissolve fixes that in one tap.
EditorPro offers 37 transitions across six categories: Basic, Motion, Wipes, Recommended, 3D, and Blur. To add one, tap Transition in the bottom tool strip, choose Transition In or Transition Out, pick a transition, set the duration (the default is 1.0 second), and apply it. You can apply a transition to a single clip or to all clips at once.
For a clean, modern look, start with Cross Dissolve or Film Dissolve. For more energy, try Whip Pan Right or Zoom In. For a retro feel, VHS or Glitch transitions add character. Our guide on how to add transitions to a video on iPhone covers all of them in detail.
Step 5: Add music or keep the original audio
Combining videos usually means combining audio too. Some clips may have audio you want to keep (a laugh, a wave crashing, someone talking), while others are better muted with a music track underneath.
In EditorPro, tap Music in the bottom tool strip to open the audio panel. From there you can:
- Mute or unmute individual clips. Tap a clip and use the Mute toggle to silence its audio.
- Adjust per-clip volume. Lower the volume on a clip with loud background noise without losing it entirely.
- Add background music. Choose from 9 built-in background tracks, or import your own. You can set fade in and fade out, adjust the music volume, and offset the start point.
- Add sound effects. The built-in library has 44 short effects: whooshes, impacts, dings, risers, and more. Drop them at clip boundaries for extra punch.
For the full walkthrough, read our guide on how to add music to a video on iPhone.
Step 6: Set the right aspect ratio
If your clips were shot in different orientations, you will need to pick one aspect ratio for the final video. Tap Aspect in the bottom tool strip to choose from options like Portrait (9:16) for Reels and TikTok, Landscape (16:9) for YouTube, Square (1:1) for Instagram feed posts, and Cinematic (21:9) for a widescreen look.
When you change the aspect ratio, each clip adapts based on the fill mode you choose: Fit (black bars), Blur Background, Zoom to Fill, Mirror Edges, Solid Color, or Gradient. Blur Background is a popular choice for vertical Reels because it fills the frame without cropping your subject.
Step 7: Export as one video
Once your clips are arranged, trimmed, connected with transitions, and paired with audio, you are ready to export. Tap the share icon in the top toolbar to open the export sheet.
Choose a quality tier:
- Web Share (720p, 3 Mbps): smallest file, fastest export, good for quick messaging.
- 720p HD (5 Mbps): standard HD, good for most social posts.
- 1080p HD (10 Mbps): crisp, the sweet spot for Reels, TikTok, and YouTube Shorts.
- 4K Ultra (3840x2160, 35 Mbps): maximum quality, available with Pro.
Free exports include a small watermark in the bottom-right corner. If you post frequently and want clean, watermark-free exports plus 4K output, EditorPro Pro removes the watermark and unlocks 4K for $2.99/month or $14.99/year (with a 7-day free trial on the annual plan). Either way, you can export as many videos as you want.
For more on getting clean exports, see our guide on how to export video without watermark on iPhone.
Quick tips for better combined videos
- Keep it tight. Aim for 15 to 60 seconds. Shorter videos get watched to the end, which helps the algorithm push them further.
- Vary clip lengths. Mix 2-second cuts with 5-second clips to create rhythm. Uniform clip lengths can feel monotonous.
- Use a consistent filter. Applying the same filter to all clips (or using the "all clips" scope toggle) ties footage from different sources into one visual style.
- Lead with your best clip. The first 1 to 2 seconds determine whether someone keeps watching. Do not save the best for last.
- Let the AI assistant help. If you are not sure where to start, tap the sparkles icon and type something like "combine these clips into a 20-second reel with upbeat music." The AI assistant arranges, trims, and adds music for you.
You do not need a desktop to merge videos
Combining videos on iPhone is straightforward once you know the steps: import, arrange, trim, add transitions, layer in music, set the aspect ratio, and export. The whole process takes a few minutes, and the result is a single share-ready clip that looks like it came from a much more complicated setup.
Combine your clips in minutes
EditorPro is a free iPhone video editor that lets you import, trim, arrange, and export combined videos with transitions and music. Download it and stitch your first video today.
Download on the App Store